Learning how to clean evaporator coils isn’t the most glamorous home maintenance task, but for anyone living in the Phoenix heat, it’s absolutely crucial for a cool and efficient home. A dirty coil can secretly sabotage your AC’s performance, driving up energy bills and straining the entire system. Honestly, a few simple steps can make a world of difference in restoring your air conditioner‘s power.
Why Cleaning Your AC Evaporator Coil Matters in Phoenix
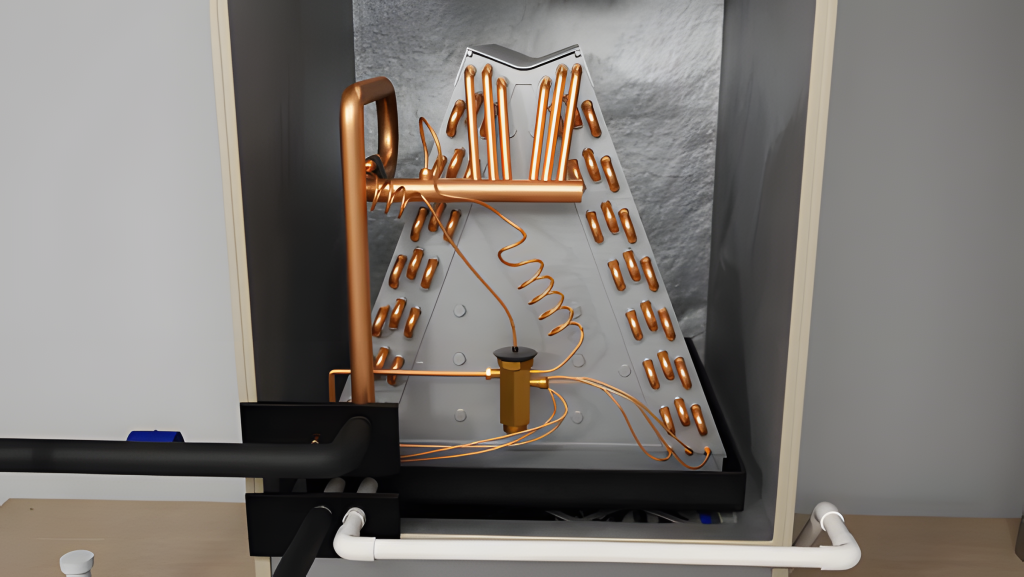
When your air conditioner starts to struggle in the middle of a brutal Phoenix summer, it’s not just an inconvenience—it feels like an emergency. More often than not, the real villain isn’t a massive system failure. It’s something much simpler: a dirty evaporator coil. This part, hidden away inside your indoor unit, is basically the lungs of your AC, pulling heat and humidity out of the air.
As air cycles through, that coil gets caked with dust, pet dander, pollen, and all the other gunk floating around your home. You know what? This blanket of grime forces your entire system to work harder just to do its job. Imagine trying to run a marathon while breathing through a coffee stirrer. It’s exhausting and wildly inefficient. A dirty coil triggers a whole chain reaction of problems you simply can’t afford to ignore, especially when the temperature outside is soaring past 100 degrees.
The Consequences of a Neglected Coil
The fallout from a dirty coil goes way beyond just feeling a little too warm inside. You’re almost guaranteed to see a cascade of issues that impact your comfort, your wallet, and even your health. Let me explain the key problems we see every day in the field:
- Skyrocketing Energy Bills: Your AC has to run longer and harder to achieve the temperature you’ve set on the thermostat. This extra runtime directly translates to higher electricity costs, month after month. It’s one of the most common causes of unexplained energy bill spikes.
- Unnecessary System Strain: All that extra effort puts a tremendous amount of stress on the compressor—the heart and soul of your AC system. This is the fast track to a premature and very expensive breakdown, often happening at the most inconvenient time.
- Poor Indoor Air Quality: The damp, dusty surface of a dirty coil becomes the perfect breeding ground for mold, mildew, and bacteria. These contaminants then get blown right back into the air you and your family breathe. A completely clogged coil can even lead to the unit freezing up, a clear sign that airflow is dangerously restricted.
A clean evaporator coil isn’t just about routine maintenance—it’s a direct investment in your comfort, your wallet, and your peace of mind. A little proactive cleaning restores cooling power, cuts down on energy waste, and helps you dodge a costly mid-summer breakdown.
Understanding why and how often you need to maintain your home’s systems is key to keeping everything running smoothly. You’ll find a similar logic applies to solar panels, highlighting the importance of regular cleaning for peak efficiency. While cleaning the coil is a totally manageable DIY project for most folks, knowing when to call for professional help can save you from accidentally causing expensive damage. Our team at Comfort Experts has seen firsthand how a small mistake can lead to a big repair bill, which is why we emphasize a safety-first approach.
Gathering Your Tools and Safety Essentials
Before you even think about opening up your AC unit, let’s talk about preparation. This isn’t a job where you just grab whatever’s under the kitchen sink—using the wrong stuff can wreck your system and turn a small cleaning task into a huge headache. Your evaporator coil is surprisingly delicate, composed of thin aluminum fins that can be easily bent or damaged, and your safety is the absolute top priority.
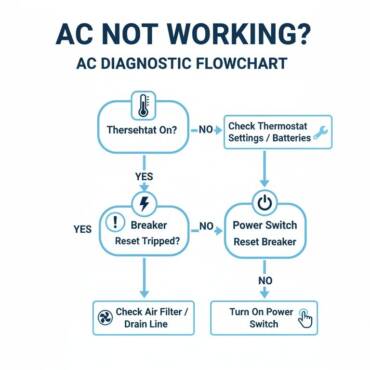
The first, most critical move is to kill all power to your HVAC system. That means turning it off at the thermostat and—this is the part you absolutely cannot skip—flipping the correct breakers in your electrical panel. This is the only way to be 100% sure the system is de-energized and safe to handle. Never assume turning off the thermostat is enough; there are still live electrical components inside the unit.
The Right Gear for the Job
Having the correct supplies ready to go makes the whole process smoother and safer. You don’t need a truck full of professional gear, but a few specific items are non-negotiable if you want to learn how to clean evaporator coils the right way. As seasoned professionals, we know that the right tool not only makes the job easier but also prevents costly mistakes.
To make it easy, here’s a quick rundown of what we keep in our tool bags for this exact job.
| Tool/Material | Purpose | Comfort Experts Pro-Tip |
|---|---|---|
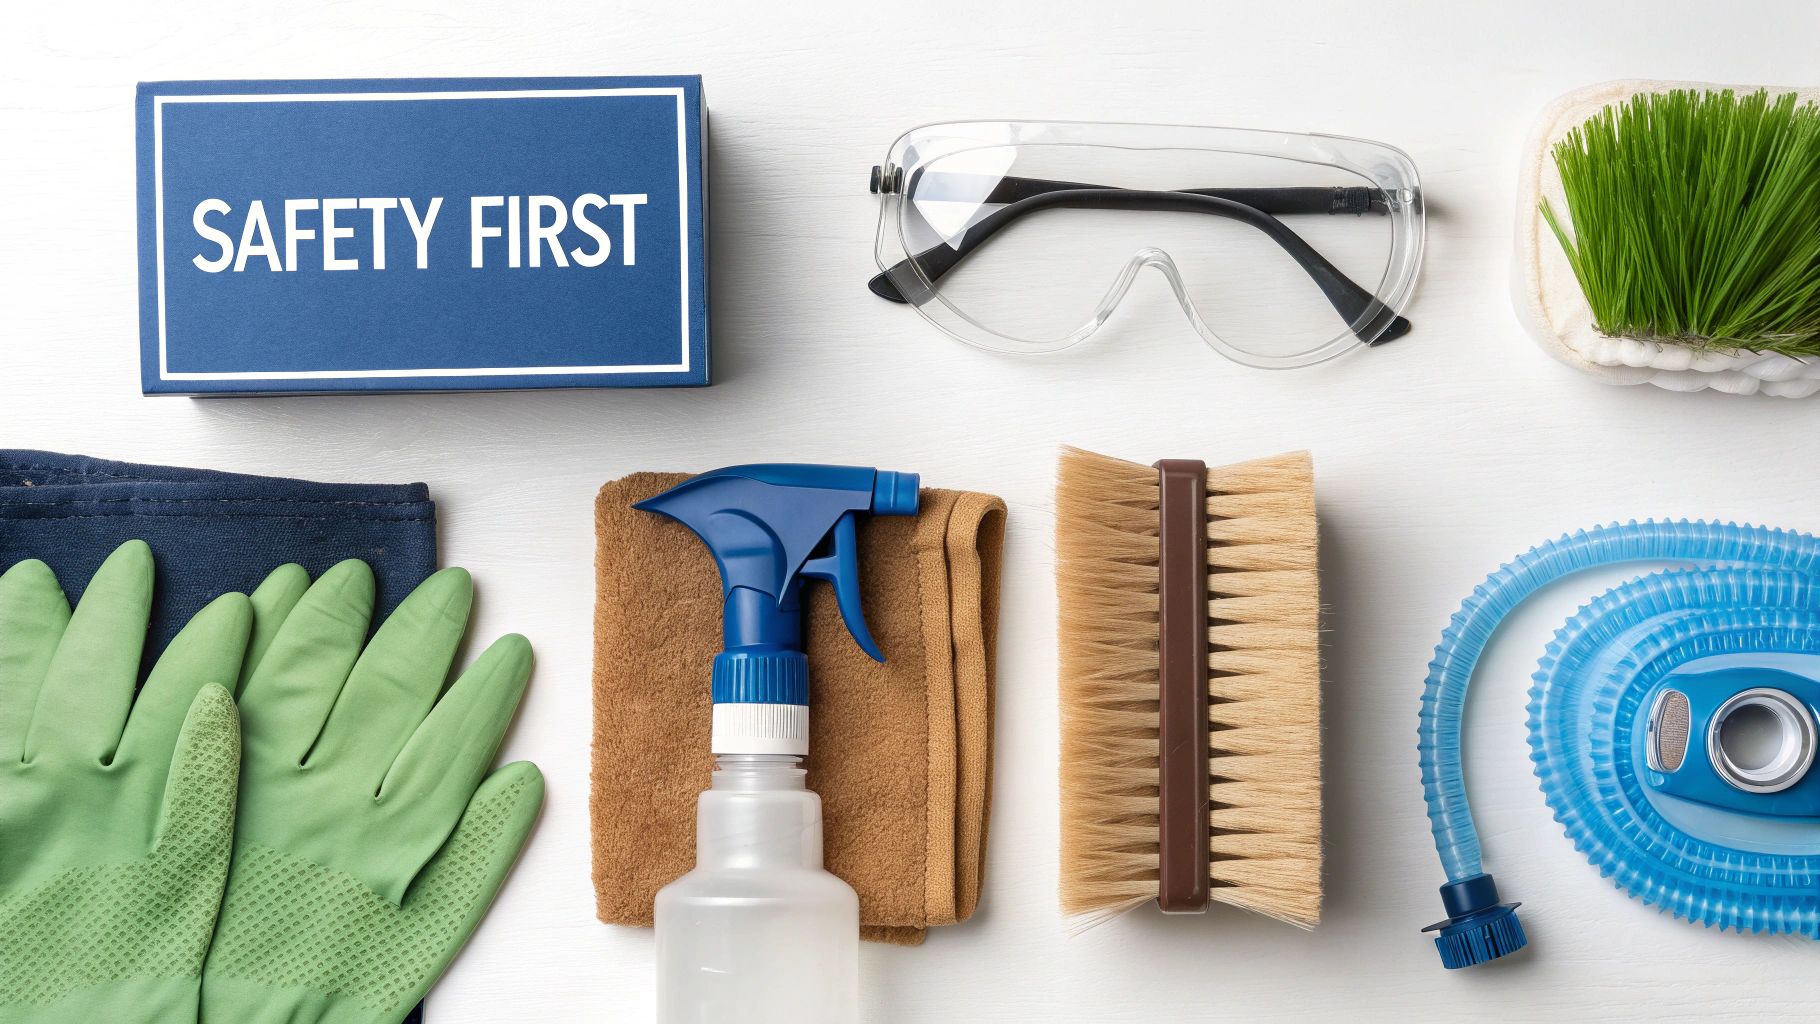
| Safety Glasses & Gloves | Protects your eyes from flying debris and hands from sharp metal fins and chemicals. | Don’t skip the gloves. Those aluminum fins can be sharper than they look, and coil cleaners can irritate the skin. |
| Soft-Bristle Brush | Gently loosens caked-on dust and debris without bending the delicate aluminum fins. | An old paintbrush or a dedicated fin brush works perfectly. Stiff-bristled brushes are a definite no-go. |
| No-Rinse Foaming Coil Cleaner | A specially formulated spray that breaks down grime safely. The foam clings, cleans, and then drips away. | This is the safest and most effective option for DIY. It’s designed to work with your system’s natural condensation process. |
| Shop Vacuum with Brush Attachment | Sucks up loose dust, cobwebs, and pet hair before you apply any cleaner. | Getting the loose debris off first makes the spray cleaner much more effective and prevents it from turning into a muddy mess. |
| Screwdriver or Nut Driver | To remove the screws holding the access panel in place. | Have both a Phillips and a flathead on hand, as panel screws can vary. A multi-bit driver is a great all-in-one tool. |
Having the right tools is half the battle. Now, let’s talk about that cleaner.
Choosing the right cleaning solution is absolutely critical. Harsh, acidic cleaners can eat away at the aluminum fins and copper tubing over time, leading to refrigerant leaks and very expensive repairs. Always, always stick to products specifically designed for HVAC evaporator coils.
If you’re curious about the chemistry, understanding degreasers and how they attack oily grime can give you some background on why the right formula matters so much here. And remember, the best offense is a good defense. A dirty coil is often the result of a neglected air filter. Keeping those filters fresh is your first and most important line of defense. Check out our guide on how often to change your air filters in Arizona to stay ahead of the game.
Your Guide to Cleaning the Evaporator Coil
Alright, ready to dive in? This is where we get practical and walk through cleaning your evaporator coil, step by step. Forget a rigid, numbered list—think of this as a conversation, sharing the same approach our Comfort Experts techs use out in the field. The goal here is a thorough clean without accidentally causing damage, ensuring your AC runs like a dream when you’re done.

First up, you have to actually find the coil. It’s tucked away inside your indoor air handler, which for most homes is in a closet, the attic, or the garage. Once you’ve tracked it down and—this is critical—killed the power at the breaker box, you can remove the access panel. It’s usually just held on by a few screws. With the panel off, you’ll be looking right at the A-shaped or slab-style coil. Now, we can get to work, starting with a “dry clean.”
Starting with a Dry Clean
Before we introduce any moisture, the first task is to get rid of all that loose, caked-on gunk. This is where your soft-bristle brush and shop vacuum are your best friends.
Gently brush the coil fins, always moving in the same direction they run (usually top to bottom). Be gentle! Bending these delicate aluminum fins is a super common and costly mistake that will absolutely choke off your airflow. As you brush, follow right behind with your vacuum’s brush attachment to suck up all the dust and pet hair you knock loose. Take your time with this part; a patient approach prevents damage. Getting this first dry pass done right makes the next phase way more effective. It’s like sweeping the floor before you mop—it gets the big stuff out of the way so the deep cleaner can attack the really stubborn grime.
Moving to the Wet Clean
Now it’s time for the foaming coil cleaner. Here’s the thing: this stuff is pretty amazing when used correctly. The no-rinse kind is designed to expand deep into all the nooks and crannies, dissolve the leftover dirt, and then condense and simply drip away through the condensate drain line—just like your AC’s normal condensation does.
Start spraying at the top of the coil and work your way down with an even, back-and-forth motion. You want a good, consistent coat, but there’s no need to completely saturate it to the point of heavy dripping. Let the foam sit and do its thing for the time recommended on the can, which is typically 10-15 minutes.
While you’re waiting, this is a perfect time to inspect the drain pan sitting right below the coil. A clog in that pan is a frequent culprit behind water damage. A backed-up drain can cause serious issues, which is why it’s so important to know the signs of why an AC might be leaking water.
The energy savings from a clean coil can be huge, often cutting cooling bills by up to 25%. For a Phoenix homeowner whose AC runs over 2,500 hours a year, that could easily mean $200-$400 back in your pocket annually. Beyond the savings, a clean coil restores proper airflow and can cut down on airborne mold spores by as much as 85%. Once the foam has worked its magic and dissipated, you can pop the access panel back on, restore power at the breaker, and fire up your system. Job done.
When to Pause and Call a Professional
Knowing your limits is the smartest part of any DIY project, especially when you’re dealing with something as crucial as your air conditioner. While a basic cleaning is totally manageable for many homeowners, there are definite red flags that mean it’s time to put the tools down and call for backup. A simple task can get complicated—and expensive—fast.

Sometimes, the gunk you find is more than just surface-level dust. If you run into a thick, matted layer of grime that your brush and spray cleaner just can’t penetrate, that’s a sign you need a pro with more powerful tools. The same goes for bent coil fins. Trying to straighten them yourself without a proper fin comb can easily puncture the delicate tubing hidden within, causing a refrigerant leak.
Clear Warning Signs to Watch For
Let’s be blunt: certain discoveries demand an expert eye, and fast. Finding an oily or greasy residue on the coil is a major one. This almost always points to a refrigerant leak—a serious problem that requires a licensed technician to handle safely and legally due to EPA regulations.
Other clear signs you should stop what you’re doing and call a pro include:
- Significant Corrosion: A little surface rust might be okay, but if you see extensive corrosion eating away at the coil or connections, it can compromise the whole system. That needs a professional assessment to determine if a repair is possible or if a replacement is imminent.
- Visible Mold or Mildew: A small patch of grime is one thing. Widespread mold is another beast entirely. It requires specialized cleaning agents and techniques to fully eradicate it and protect your home’s air quality.
- Damaged Electrical Components: If you spot any frayed wires, melted plastic, or sketchy-looking electrical parts near the coil, don’t touch a thing. It’s a serious safety hazard that requires an experienced technician to address.
The financial stakes are high when it comes to HVAC maintenance. Dirty evaporator coils can slash your AC’s efficiency by up to 30%. In the scorching Phoenix Valley, this forces AC units to run 20-30% longer, leading to significant strain that can result in over $1,000 in compressor repair bills. You can find more details in this commercial HVAC market report.
Trying to push through these issues to save a few bucks can backfire spectacularly, turning a small problem into a massive repair bill. Understanding the potential AC tune-up cost for professional service helps you budget for the essential maintenance that prevents these headaches in the first place.
Keeping Your System Healthy for the Long Haul
A clean coil is a great first step, but keeping your AC running smoothly year after year is all about proactive care, not one-off fixes. Think of it as shifting from emergency repairs to smart, ongoing maintenance. This is what protects your entire system and keeps you from having to make a frantic call on a 110-degree day.
Your first line of defense is ridiculously simple: change your air filter. Here in the dusty Phoenix area, we tell our customers to check it every month and plan on replacing it at least every 60-90 days. No excuses. A clean filter is the single best thing you can do to prevent that evaporator coil from getting dirty in the first place.
Why a Professional Tune-Up Is a Game-Changer
While a DIY cleaning gets the surface-level gunk off, it can’t compete with a professional tune-up. A trained technician does more than just clean a coil; they perform a deep, comprehensive inspection of the entire system. This goes way beyond learning how to clean an evaporator coil from a blog post. We’re talking about checking electrical connections for safety, testing refrigerant levels for optimal performance, cleaning the drain line to prevent water damage, and making sure every single component is playing nicely together.
Here’s a good way to think about it: changing your filters is like brushing your teeth every day. The annual tune-up is your yearly check-up at the dentist. It catches small problems before they turn into expensive, painful emergencies.
Just think about the numbers. Annual coil cleanings alone can boost your HVAC system’s lifespan by a whopping 40%. In our Arizona climate, where dust and grime build up twice as fast, ignoring this maintenance can slash your efficiency by 15-25%. The good news is that roughly 55% of modern coils are made from corrosion-resistant aluminum. Keeping them clean helps prevent pitting and can push your unit’s life out to a solid 15-20 years. You can dig deeper into some of the industry data behind these HVAC cleaning findings if you’re curious.
When to Call in the Pros for Your Phoenix AC
Learning how to clean an evaporator coil yourself is a great way to take control of your home’s comfort. A clean coil truly is the fastest path to better cooling, lower energy bills, and a longer life for your AC system—all things that are non-negotiable in the Phoenix heat. But knowing your limits is just as important as knowing how to do the job. So, what if you’ve done everything right and your AC still isn’t performing? Sometimes, you just need a professional.
Trust Your Local HVAC Team
If you open up that panel and find a thick, matted blanket of grime that just won’t budge, it’s time to put the tools down. Same goes if you’re just not comfortable with the idea of taking apart your system. That’s what we’re here for. The Comfort Experts team has been serving the Phoenix Valley with honest, licensed, and insured HVAC work since 2011. Our experience in this climate means we understand the unique challenges your system faces.
Our technicians have the right tools, commercial-grade cleaning agents, and the expertise to safely restore your system to factory-fresh performance. We treat your home like our own and make sure the job is done right the first time, giving you total peace of mind. Your comfort is our business, and we’ve built our reputation on it by providing trustworthy service for over a decade.
A professional cleaning does more than just remove dirt. It’s an opportunity for a trained eye to spot small, underlying issues—like a failing capacitor or a slow refrigerant leak—before they turn into major breakdowns. Think of it as a smart investment to protect your system for the long, hot season ahead.
When you want the job done right and need the assurance of professional expertise, give the team at Comfort Experts a call. You can reach our friendly staff at 480-207-1239 or schedule service online for fast, reliable care from a team you can trust.
Whether you require installation, repair, or maintenance, our technicians will assist you with top-quality service at any time of the day or night. Take comfort in knowing your indoor air quality is the best it can be with MOE heating & cooling services Ontario's solution for heating, air conditioning, and ventilation that’s cooler than the rest.
Contact us to schedule a visit. Our qualified team of technicians, are always ready to help you and guide you for heating and cooling issues. Weather you want to replace an old furnace or install a brand new air conditioner, we are here to help you. Our main office is at Kitchener but we can service most of Ontario's cities
Source link