There’s nothing quite as maddening as going to take a nice hot shower only to be met with a weak, trickling stream of water. Or trying to fill up a pot and waiting an eternity for it to slowly dribble full. If your home’s water pressure has suddenly gone from a raging river to a gentle creek, you’re definitely not alone.
Low household water pressure is one of those annoying problems that can make even simple tasks like washing dishes or flushing the toilet a serious chore. But before you resign yourself to a lifetime of unsatisfying trickle baths, know that this issue often has some pretty straightforward explanations and solutions.
This guide will walk you through all the common culprits behind weak water flow, from leaks and pipe obstructions to municipal issues and fixture problems. You’ll learn easy diagnostic steps to help identify the source of those pressure problems. We’ll also cover quick DIY fixes you may be able to handle yourself versus when it’s really time to call in the pros.
By the time you’ve finished reading, you’ll be equipped with the knowledge to get that water pressure back up to a steady, rejuvenating flow. No more wasting time (and water) waiting on a trickle! Let’s get this straightened out so you can enjoy powerful streams once again.
Understanding Water Pressure
Water pressure is just the force that pushes water through pipes and out of fixtures like faucets or showerheads. More pressure behind that water equals stronger flow. It’s kind of like squeezing a garden hose – the tighter you squeeze, the more powerful that stream becomes. Pretty simple concept, right?
For most city/town water systems, pressure starts high at the treatment plant or water tower thanks to powerful pumps and gravity. We’re talking pressures between 50-100 PSI getting that water moving initially. But as it travels through all those underground main distribution pipes, that pressure naturally decreases the farther it gets from the source.
By the time water reaches your home’s plumbing system, the pressure is still decent but more manageable – usually around 40-70 PSI or so. That allows for good flow out of fixtures while preventing forces high enough to potentially damage pipes over time.
Your home’s main water line and plumbing distribute that pressure throughout the house. Pipe size, condition, length, layout with twists and turns – all those factors impact how much pressure actually makes it to each fixture. The more resistance that water encounters, the more pressure drops off along the way.
Appliances like water heaters and washing machines also require a certain minimum pressure to function properly. Too little pressure and you get weak showerheads, inefficient appliance performance, and other annoying issues.
So when residential pressure takes a nosedive, it often means something is obstructing or restricting that water flow somewhere between the municipal supply and your home’s plumbing. Diagnosing and eliminating those flow restrictions is the key to restoring optimal pressure.
With that basic groundwork laid, we can start exploring some of the most common culprits that cause low pressure headaches for homeowners. Knowing the typical causes makes it easier to track down and fix the problem quickly.
Common Causes of Low Water Pressure
If your home’s water pressure has taken a nosedive from a nice powerful flow to more of a trickle, there could be a few different things going on. Figuring out what’s actually causing those weak streams is job one for getting that pressure back up.
Issues with the Water Supply
Sometimes the issue is outside your home with the municipal water supply itself. A few things to check on their end:
Major Leaks – Big leaks or busted pipes in the main distribution lines from the water source can seriously drop pressure for entire neighborhoods. Utilities should notify you if this is the case.
Faulty Pressure Reducers – Most homes have a valve where the main water line enters to prevent crazy high pressures. If this valve is failing or set too low, it starves your plumbing of pressure.
Frozen Pipes – In cold climates, ice blockages in pipes leading to the home from the street are a super common low pressure headache each winter.
Plumbing System Problems
But more often than not, low pressure gremlins are hiding somewhere in your home’s plumbing system itself. Common issues include:
Leaky Pipes – Even small leaks in exposed pipes or underground lines can create enough water loss to tank pressure throughout the house. Regularly checking for and fixing leaks is key.
Clogged Pipes – Over time, mineral buildup or debris can accumulate inside pipes, gradually restricting flow and pressure. Older, corroded galvanized pipes are especially prone to this.
Main Line Issues – Problems with the main water line running into your home like improper sizing, excessive length, or damage can really impact pressure.
Fixture-Specific Problems
In some cases, low pressure may only be affecting certain fixtures rather than the whole home. If so, the issue likely lies with just that fixture’s components:
Clogged Aerators – Faucets and showerheads have little mesh aerators that can get clogged with mineral deposits, choking off flow and pressure.
Faulty Valves – The shutoff valves controlling water flow to a fixture can fail or corrode over time, not opening fully and reducing pressure.
Old Low-Flow Fixtures – Older low-flow showerheads and faucets are designed to restrict flow rates, which can feel like low pressure compared to newer models.
Knowing what typically causes low pressure gives you a roadmap for diagnosing and fixing the issue quickly. Next up is running through some simple tests to help identify what’s actually going on in your home.
Diagnosing Low Water Pressure
Once you’ve got an idea of what typically causes low water pressure, it’s time to do a little detective work and narrow down what’s actually going on in your home. Taking the time upfront to properly diagnose the issue will save you a ton of headaches trying to solve the wrong problem.
There are two main scenarios you’ll need to figure out – low pressure affecting every fixture and appliance in your home, or just isolated rooms/fixtures. The diagnostic steps differ a bit for each situation, so start by determining whether this is a whole-home or localized low pressure issue.
Whole-House Low Water Pressure
If every sink, shower, appliance, you name it is experiencing weak flows and crappy pressure, that points to a problem with either your main water supply or the plumbing system itself. Here are some tips for diagnosing it:
Check the Pressure
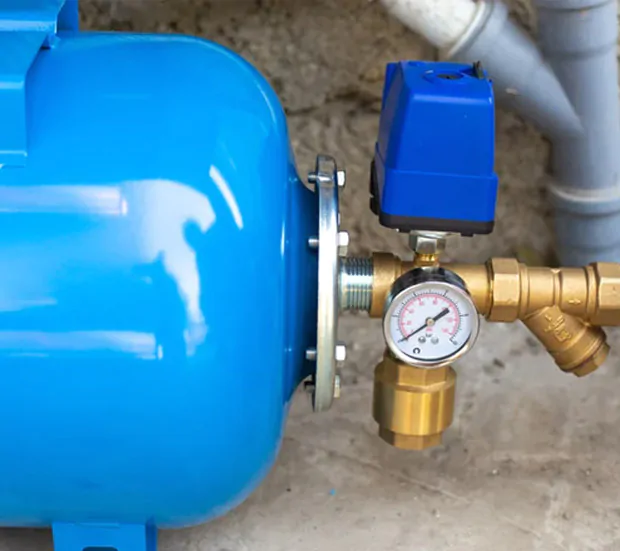
An easy first step is hooking up a basic pressure gauge to an exterior hose bib or laundry room faucet. This will give you a PSI reading to confirm whether your home’s pressure has indeed dropped below the optimal 40-60 PSI range.
Listen for Leaks
Walk around and listen carefully near any exposed pipes, the water heater, and outdoor hose bibs for any hissing or running water sounds indicating a potential leak. You can also check your water meter – if it’s running when no fixtures are on, you’ve definitely got a leak somewhere.
Inspect Visible Pipes
Take a good look at any exposed pipes in basements, crawl spaces, utility rooms for signs of heavy mineral buildup, corrosion, or damage that could be obstructing flow. Pay close attention to the main water line coming into your home.
Isolate the Source
Once you’ve confirmed it’s a whole-home issue, start isolating the source by shutting off smaller branch supply lines to see if it restores pressure elsewhere. This can help reveal if the problem is the main line or just one section of plumbing.
Room or Fixture-Specific Low Pressure
If the low pressure seems confined to just a bathroom group, kitchen sink, or single fixture, the issue likely lies with those localized plumbing components or the fixture itself. Try these tips:
Check Supply Lines
Inspect any exposed supply line pipes feeding that room or fixture for signs of leaks, heavy mineral buildup, or obstructions that could be restricting flow just to that area.
Isolate with Shutoffs
Most fixtures have small shutoff valves right behind or underneath them. Try closing these completely then reopening them – if pressure improves, there could be an obstruction or valve issue there.
Remove Aerators/Showerheads
For faucets and showers, unscrew the aerator or showerhead itself and check for clogs or heavy mineral buildup in those components choking off flow and pressure.
Knowing whether your low pressure is a whole-home or localized issue narrows down where to start looking for potential problems. From there, some basic testing and process of elimination can often reveal the likely culprit so you can take the proper corrective steps.
Detailed Troubleshooting Steps
Once you’ve diagnosed whether your low pressure issue is impacting the whole home or just specific areas, it’s time to take more decisive action. Depending on what your initial tests revealed, there are some detailed troubleshooting steps you can try to potentially resolve the problem yourself.
For Whole-Home Low Pressure:
Check Municipal Supply
If your pressure gauge confirmed unusually low household pressure, start by contacting your municipal water supplier. They may already be aware of a major supply line leak or other issue impacting pressure in your area. Their team can investigate and make any necessary repairs on their end.
Inspect the Pressure Reducer
Most homes have a pressure reducer valve (PRV) where the main water line enters, designed to prevent excessive pressure. Over time, these PRVs can become stuck or need adjusting. Locate yours, usually in the basement or garage, and check for any visible damage or debris obstructing it. Properly adjusting or replacing a faulty PRV can instantly restore pressure.
Flush Supply Pipes
If your main supply pipes seem to be the culprit based on testing, you may be able to temporarily resolve clogs by giving them a vigorous flush. Simply shut off all fixtures, then run the highest-flow outlet like a bathtub spigot for 30-60 minutes to try forcing out any built-up gunk.
For Localized Low Pressure:
Check Shutoff Valves
Make sure the individual shutoff valves controlling water flow to that room or fixture are fully open and operating properly. Valves can get sticky over time, not opening completely and restricting flow. Try lubricating or replacing any faulty valves.
Clear Clogged Aerators
Unscrew the aerator at the end of a faucet or showerhead and remove any mineral deposits or debris clogging up the mesh screen. An old toothbrush works great for scrubbing these clean. For really stubborn buildup, you can soak aerators in vinegar to help dissolve it.
Flush Supply Lines
Just like the main pipes, mineral and sediment accumulation inside those smaller fixture supply lines can gradually restrict flow over time. Try disconnecting the line at both ends and giving it a vigorous flush with water to clear out any obstructions.
Replace Outdated Fixtures
If you’ve got really old showerheads or faucets, especially the low-flow variety, it may simply be time for an upgrade. Newer models provide excellent flow while still conserving water. Swapping out those dated fixtures can instantly boost pressure.
For both whole-home and localized low pressure issues, a fair amount of basic DIY troubleshooting is possible before requiring professional assistance. Taking a systematic approach to isolate the cause and carefully working through these detailed steps can potentially save you the cost of a service call.
Of course, there are also times when a persistent or complex issue is simply beyond the scope of DIY repairs. If you’ve exhausted all your troubleshooting efforts with no luck, calling in a licensed plumber is the wise move to properly diagnose and repair the underlying problem. Don’t risk causing bigger headaches by taking things too far yourself!
Preventive Measures to Maintain Optimal Water Pressure
Once you’ve resolved that low pressure headache, the last thing you want is for it to come creeping back again down the road. Taking some simple preventative measures can go a long way in keeping your home’s water pressure strong and those pipes flowing freely.
Start With Leak Detection
Even tiny leaks that seem harmless can create enough water loss over time to seriously impact pressure throughout your plumbing system. Make a habit of regularly checking exposed pipes, fixtures, and appliance hose connections for any dampness, drips, or moisture spots that indicate a leak.
You can also monitor your water meter for signs of hidden leaks. Turn off every drop of water in your home, then watch the meter – if it continues running, you’ve got a leak somewhere that needs tracking down and repairing.
Catching and fixing leaks early prevents them from worsening into bigger problems. It also eliminates that constant water loss which can gradually degrade your home’s pressure over time.
Flush Supply Lines Annually
Even with no visible leaks, mineral sediment can slowly build up inside your plumbing pipes and fixtures over the years. This gradual buildup can increasingly restrict water flow and lower pressure.
An annual flushing of both your main supply lines and individual fixture lines helps clear out any accumulated gunk. Simply disconnect the lines at both ends and run water through at full force for several minutes to flush out debris.
For really stubborn mineral buildup, you can use a store-bought descaling solution. Just be sure to thoroughly flush the lines with clean water afterward.
Replace Outdated Fixtures
Those old school showerheads and faucets from the 80s or 90s don’t just look dated – their flow restrictors can create that dreaded “trickle” sensation as they age. Upgrading to new models provides excellent pressure while still conserving water.
You’ll also want to consider the condition of any other older plumbing fixtures or appliances with water connections. Mineral deposits can gradually corrode and restrict flow on things like dishwashers, washing machines, and toilets over decades of use. Planned replacements prevent low pressure issues.
Schedule Professional Maintenance
Even with diligent DIY preventative care, your home’s plumbing system can still develop hard-to-detect issues that impact pressure over time. That’s why scheduling an annual professional plumbing inspection is so valuable.
During their tune-up, a licensed plumber can thoroughly flush your main supply lines with specialized equipment to remove built-up sediment. They’ll also perform a comprehensive diagnostic check on your home’s water pressure, fixtures, appliances, and exposed plumbing to catch any developing problems early.
Many plumbers offer affordable annual maintenance plans that combine all these preventative services into one flat fee. It’s a wise investment to keep your water flowing at peak pressure for years to come!
A little preventative TLC for your plumbing goes a very long way. By making these simple maintenance tasks a regular priority, you can avoid sudden low pressure surprises and extend the lifespan of your entire system. No more weak trickles or dribbles – just reliable, powerful water flow whenever you need it.
Pump Up That Pressure with Christian HVAC
When your home’s water pressure takes a nosedive from a steady flow to a trickle, it’s time to call in the big guns at Christian HVAC. As the area’s go-to plumbing experts for over 35 years, we’ve got the skills to diagnose and fix low pressure problems fast.
From pesky leaks and mineral buildup to complex system gremlins, our licensed plumbers have seen and repaired every low pressure issue under the sun. We’ll get that water pumping at full force again quickly and affordably.
We also offer affordable tune-up plans to help maintain optimal pressure for years to come through preventative care. Don’t let weak dribbles ruin your household routine a day longer! Dial (215) 488-5795 to schedule service with the pressure pros at Christian HVAC.
Whether you require installation, repair, or maintenance, our technicians will assist you with top-quality service at any time of the day or night. Take comfort in knowing your indoor air quality is the best it can be with MOE heating & cooling services Ontario's solution for heating, air conditioning, and ventilation that’s cooler than the rest.
Contact us to schedule a visit. Our qualified team of technicians, are always ready to help you and guide you for heating and cooling issues. Weather you want to replace an old furnace or install a brand new air conditioner, we are here to help you. Our main office is at Kitchener but we can service most of Ontario's cities
Source link


Add Comment