When your cooling cuts out in a Phoenix summer, the house can get uncomfortable fast. AC heat pump repair isn’t just about replacing parts. It’s about finding the root cause quickly, avoiding mistakes that make it worse, and knowing when a safe DIY step is enough.
Your First Response When the Heat Pump Stops Working
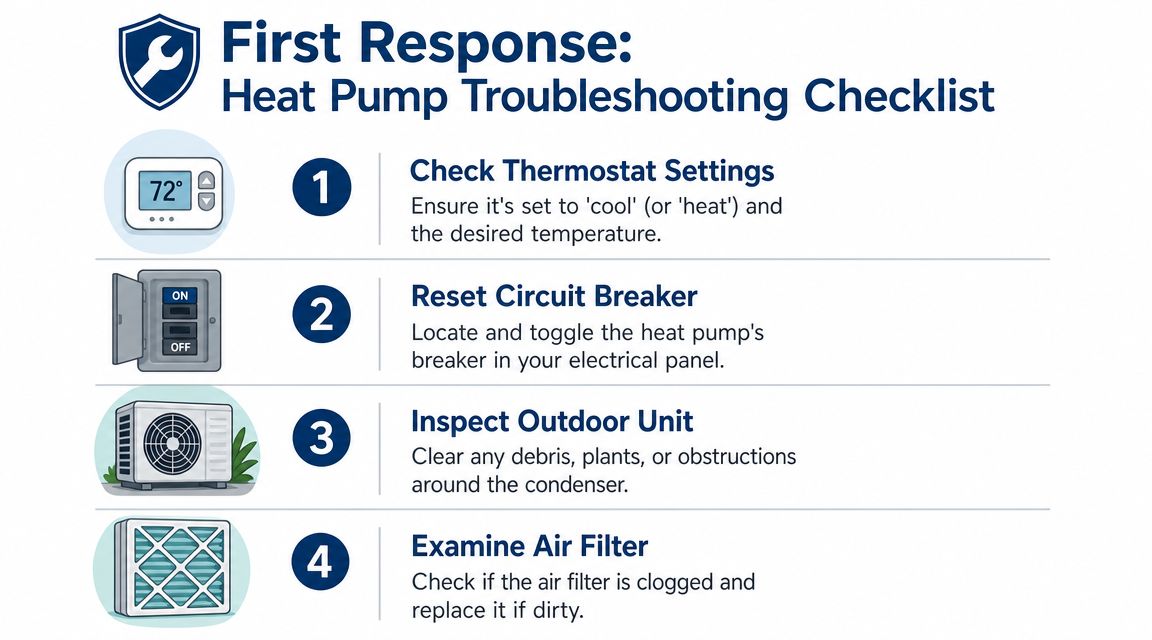
The first few minutes matter. A common initial reaction is to go straight outside to stare at the unit, but a better path is to start where a technician starts: controls, power, and airflow. A professional diagnostic workflow begins with preliminary checks like thermostat settings, airflow, and power before moving to deeper measurements, because simple control or installation-related faults are common and can often be found fast with a logical sequence, as outlined in this DOE and NREL diagnostic guideline.
Start inside before you touch anything outside
If your heat pump stopped cooling, check these items in order:
Thermostat mode
Make sure it’s set to cool, not off, fan-only, or heat. Lower the setpoint a few degrees below room temperature and listen for a response.Fan setting
If the fan is set to ON, the blower may run even when the outdoor system isn’t cooling. Set it to AUTO so you can tell whether the system is calling correctly.Breaker panel
Look for a tripped breaker for the air handler or outdoor unit. If one is tripped, reset it once. If it trips again, stop there.Air filter
Pull the filter and check it in good light. If it’s packed with dust, airflow may be restricted enough to shut performance down or start icing problems.
Practical rule: If a check can be done with your eyes and hands, without removing panels or exposing wiring, it’s usually a fair first step for a homeowner.
In Phoenix, clogged filters show up constantly because fine dust builds faster than people expect. If you’re not sure where yours is, this guide on where your air filter may be located in the house can help you find the right access point.
Check the outdoor unit safely
Once the indoor basics are done, go outside and look at the condenser or heat pump cabinet.
- Clear obvious debris
Remove leaves, trash, or anything leaning against the unit. - Look for blocked airflow
Shrubs, storage bins, or patio items too close to the cabinet can choke the system. - Listen, don’t poke
A hum, click, or silence tells you something. Don’t insert tools or hands through the grille. - Notice ice or water
Ice points to a problem. A little condensate water can be normal, but frost in cooling season is not.
If the thermostat is set correctly, the breaker is on, the filter is clean, and the unit still won’t cool, you’ve already ruled out several common no-cooling causes. That saves time when you decide what to do next.
Identifying Common Heat Pump Failures You Can Fix
Some problems look dramatic but still have a safe homeowner response. Others look small and are warning signs. In the field, the key is connecting the symptom to the likely cause without guessing.
Frozen coil or ice on the refrigerant line
If you see ice on the indoor coil, suction line, or outdoor unit during cooling mode, don’t keep running it and hope it clears. Ice usually means the system isn’t moving enough air or has a refrigerant-related problem.
The safe DIY response is simple:
- Turn cooling off
- Set the fan to ON
- Replace a dirty filter
- Open blocked supply and return vents
- Give the system time to thaw
A frozen system can’t be diagnosed properly until the ice is gone. If it ices up again after thawing and replacing the filter, that’s no longer a DIY issue.
A dirty filter sounds minor, but it can start a chain reaction. Low airflow raises stress on the system and can set up much bigger repairs later.
That point matters because American Standard’s overview of common heat pump repair issues notes that many problems begin with small oversights, and that compressor-related repairs can push the economics close to replacement territory.
Unit runs constantly but the house never catches up
This is a common Phoenix complaint. The system runs, air is moving, but the home still feels sticky or warm by late afternoon.
Possible safe checks include:
- Filter condition
If it’s loaded, airflow drops. - Outdoor coil surroundings
Dust, weeds, and debris around the cabinet reduce heat rejection. - Thermostat settings
Wrong schedule, hold setting, or fan mode can create confusing symptoms. - Registers and returns
Closed vents or blocked return grilles hurt circulation.
If you want a symptom-based comparison, this article on AC not blowing air and related airflow issues helps separate blower problems from full-system cooling problems.
Strange noises and what they usually mean
Noise matters. Not every sound means disaster, but certain sounds should stop the DIY process.
| Sound | Likely meaning | Safe homeowner action |
|---|---|---|
| Clicking at startup | Control call or relay action | Observe whether the unit starts normally |
| Rattling | Loose panel, debris, or vibration | Check for loose exterior screws or debris around unit |
| Squealing | Motor or belt-related issue on some systems | Turn system off and call if persistent |
| Grinding | Mechanical failure risk | Shut it down |
| Loud buzzing | Electrical issue or failing component | Stop and call a pro |
What you can do and what you shouldn’t
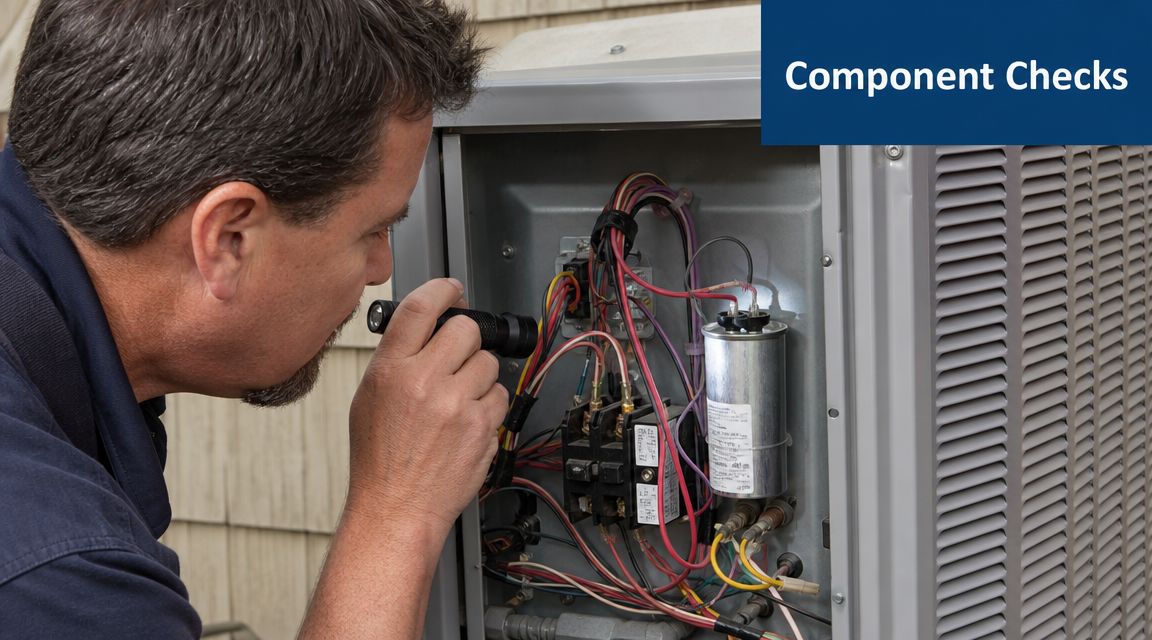
Safe homeowner tasks usually include visual inspection, filter replacement, thermostat correction, and clearing debris around the cabinet. Do not open sealed electrical compartments, test capacitors, handle refrigerant, or keep resetting breakers.
You know what? A lot of expensive calls begin with someone trying to “just check one thing” inside a live unit. That’s where a simple repair turns into a damaged board, a broken wire, or an injury.
What to Expect for Heat Pump Repair Costs
Budget matters. When your system quits, you want to know whether you’re looking at a manageable repair or the beginning of a replacement conversation.
Typical heat pump repairs often fall in the $150 to $700 range, while major work such as compressor replacement can run $800 to $2,800, according to this heat pump repair cost breakdown. That spread is wide for a reason. Some jobs involve a straightforward part swap and testing. Others require lengthy diagnosis, system recovery procedures, and verification that the failed part didn’t damage something else.
Estimated Heat Pump Repair Costs in Phoenix
| Common Repair | Estimated Cost Range (Parts & Labor) | Typical Cause |
|---|---|---|
| Capacitor, contactor, basic electrical fault | $150 to $700 | Heat stress, wear, voltage-related issues |
| Fan motor or similar mid-range repair | $150 to $700 | Age, dust buildup, bearing wear |
| Control-related repair | $150 to $700 | Failed board, relay issue, wiring fault |
| Compressor replacement | $800 to $2,800 | Electrical stress, airflow issues, refrigerant-related damage |
Why the price can change so much
A capacitor or contactor problem may be quick to confirm and repair. Compressor work is different. Before replacing it, a technician has to figure out why it failed in the first place. If the root cause isn’t corrected, the new part may fail too.
That’s why the invoice isn’t just about “the part.” It includes diagnosis, labor, system condition, and whether the repair makes sense for the age and reliability of the rest of the equipment.
Budget lens: A cheap-looking symptom doesn’t always mean a cheap fix, and a scary symptom doesn’t always mean replacement. Good diagnosis is what keeps you from paying twice.
If you want a local overview of how repair pricing is usually framed, this article on the cost to fix AC issues is a useful companion read.
When repair becomes a judgment call
If the issue is minor and the rest of the system is in decent shape, repair is usually the practical move. If the system has repeated failures, poor airflow history, or a major component failure, the decision gets more nuanced.
In Phoenix, this matters because extreme heat punishes weak parts. A unit that barely survives spring may not survive the first serious stretch of desert summer.
Phoenix-Specific Maintenance to Prevent Future Repairs
Phoenix is hard on heat pumps. Long cooling seasons, dusty air, monsoon debris, and constant runtime expose every weak spot in the system. Maintenance here isn’t optional if you want reliability.
Industry guidance says 70% to 80% of heat pump repairs happen on systems without regular maintenance, and regular service can prevent 85% of major repairs while helping the equipment last 5 to 7 years longer, based on this heat pump repairs versus annual maintenance analysis. That’s why the old advice still holds up: professional service about twice yearly and filter checks every 1 to 3 months are practical habits, especially in dusty climates.
What desert conditions do to a heat pump
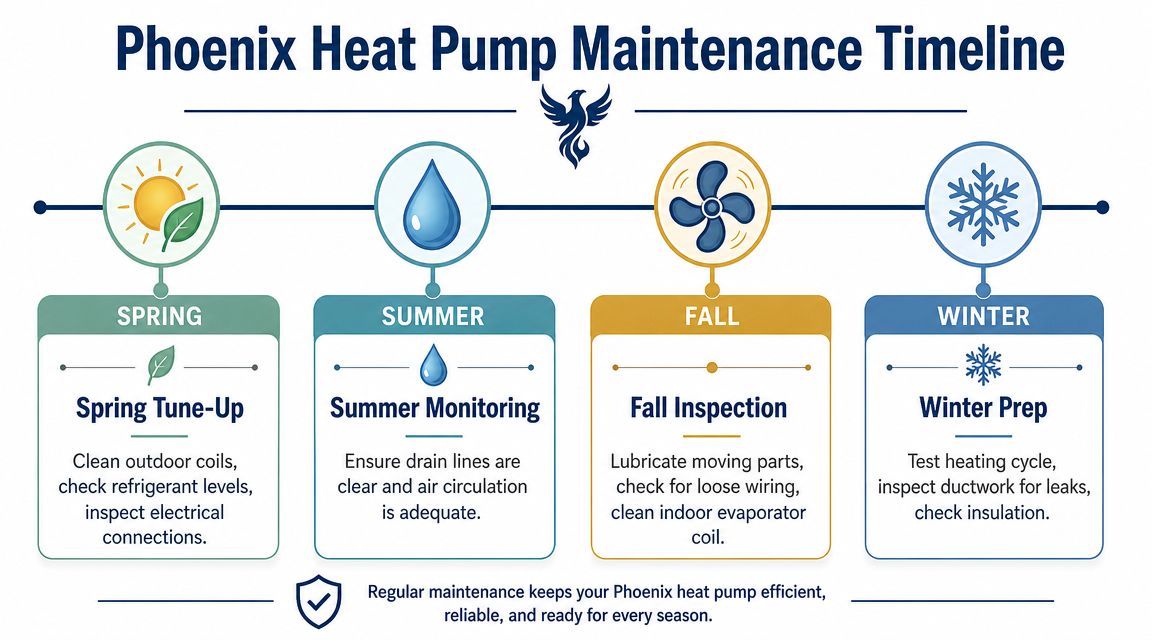
Fine dust settles onto outdoor coils and restricts heat transfer. Yard debris crowds the cabinet. Summer electrical strain exposes weak capacitors and terminals. Then winter arrives, and the system has to reverse modes cleanly for heating.
That mix is why Phoenix maintenance has to be a little more deliberate than generic online advice.
- Dust control
Check outdoor coil condition after windy stretches and dust storms. - Clearance around the unit
Keep plants, storage, and clutter away so the unit can breathe. - Filter discipline
Don’t wait until airflow is obviously weak. - Season-change testing
Run the system before the weather gets extreme so surprises happen on a mild day, not the hottest weekend.
What works and what doesn’t
Some homeowner maintenance helps. Some makes things worse.
| Good practice | Bad practice |
|---|---|
| Replacing a dirty filter on schedule | Ignoring a filter until airflow drops sharply |
| Gently removing leaves and debris around the unit | Pressure washing coils |
| Testing cooling and heating modes before peak season | Waiting for the first heat wave to find out something failed |
| Booking preventive service before heavy demand hits | Assuming “still running” means “healthy” |
A lot of homeowners mean well and damage the coil with aggressive cleaning. A light, careful approach is one thing. Blasting a coil with pressure is another.
Don’t pressure wash the outdoor coil. Bent fins and forced-in debris create their own repair bill.
For a broader seasonal checklist, this HVAC preventive maintenance checklist lines up well with what works in Arizona homes.
The maintenance rhythm that makes sense here
Spring is the time to verify cooling performance, electrical condition, and coil cleanliness. Fall is the time to check heating operation, airflow, and any wear that built up over the summer.
The biggest maintenance mistake in Phoenix is waiting until the system fails. By then, parts houses are busy, schedules are packed, and your house is already heating up.
When to Skip the DIY and Call in the Experts
Some symptoms are a clear stop sign. No more resets. No more “maybe if I try one more thing.” Safety comes first, and so does protecting the equipment from more damage.
The HVAC labor market is under pressure. Industry reporting points to a technician shortage of about 110,000 workers, while the broader market remains large and active, with more than $10 billion annually spent on HVAC repairs and maintenance, a U.S. HVAC market valued at about $30.41 billion in 2023, projected 7.4% annual growth through 2030, plus 8% projected employment growth from 2024 to 2034 and about 40,100 openings per year for mechanics and installers, according to this roundup of HVAC market and workforce statistics. In plain English, good technicians get booked fast in peak season. If your system shows serious warning signs, don’t sit on it.
Red flags that mean stop immediately
If any of these are happening, it’s time to shut the system down and get qualified help:
- Burning smell
This can point to overheating wires, motor trouble, or electrical insulation problems. - Breaker keeps tripping
Resetting repeatedly can damage equipment and creates real safety risk. - Buzzing at the disconnect or panel
Electrical issues are not DIY territory. - Outdoor unit hums but won’t start
That can involve capacitor, contactor, motor, or compressor-related faults. - Visible refrigerant line icing after basic airflow fixes
The problem likely goes beyond a dirty filter. - Oil spots, hissing, or obvious refrigerant concerns
Refrigerant work requires proper tools, procedures, and licensing. - Grinding, shrieking, or metal-on-metal noise
Mechanical failure can escalate quickly. - No cooling after thermostat, breaker, and filter checks
At that point, you need proper diagnostics.
Situations where DIY usually costs more
A lot of homeowners get into trouble when they jump from observation to disassembly. Pulling panels, replacing electrical parts by guesswork, or adding “stopgap” fixes without measurements can create a second failure on top of the first.
The right repair path for a heat pump usually follows a diagnostic order. Visual inspection. Control verification. Airflow checks. Electrical testing. Refrigerant evaluation if needed. Skipping steps wastes money because the visible symptom is not always the actual cause.
Choosing help in a busy Phoenix market
During the hottest months, everyone wants service at once. That means you should look for a licensed, insured contractor that can explain findings clearly and separate immediate repair needs from “nice to do later” recommendations. If you want a local reference point for what homeowners usually look for, this page on finding AC repair service near you covers the basics.
Comfort Experts is one local option in the Phoenix Valley. They’re a Mesa-based licensed and insured HVAC company serving local homes and businesses since 2011, with service that includes AC diagnostics, maintenance, replacements, and heat pump work.
A simple rule for homeowners
If the fix involves a filter, thermostat setting, breaker reset once, or clearing debris around the cabinet, that’s usually a reasonable homeowner task. If the fix involves wiring, refrigerant, repeated electrical faults, frozen equipment that returns to icing, or signs of major component failure, call a professional.
Let me explain the trade-off. A service call feels expensive when you’re frustrated and hot. A misdiagnosed compressor, damaged control board, or electrical injury is far more expensive.
If your system still isn’t cooling, or you’re seeing any of the red flags above, contact Comfort Experts for help. You can call 480-207-1239 or schedule service online for a safe, professional diagnosis.
Whether you require installation, repair, or maintenance, our technicians will assist you with top-quality service at any time of the day or night. Take comfort in knowing your indoor air quality is the best it can be with MOE heating & cooling services Ontario's solution for heating, air conditioning, and ventilation that’s cooler than the rest.
Contact us to schedule a visit. Our qualified team of technicians, are always ready to help you and guide you for heating and cooling issues. Weather you want to replace an old furnace or install a brand new air conditioner, we are here to help you. Our main office is at Kitchener but we can service most of Ontario's cities
Source link