Why a Dirty Thermocouple Water Heater Is More Common Than You Think
A dirty thermocouple water heater is one of the most frequent causes of pilot light failure and cold water in gas-powered homes. Before you call a plumber or buy a new unit, a simple cleaning might be all you need.
Quick answer: How to clean a dirty water heater thermocouple
- Turn off the gas supply completely
- Let the water heater cool for at least 5 minutes
- Remove the burner access panel
- Detach the thermocouple from the bracket
- Gently sand the tip with fine steel wool or emery cloth
- Wipe clean with a lint-free cloth
- Reassemble, relight the pilot, and test
Most homeowners can complete this in under 30 minutes with basic tools.
A thermocouple is a small metal safety sensor that sits in your pilot flame. Its job is to tell the gas valve, “Yes, the flame is lit, keep the gas flowing.” When soot, oxidation, or debris coat the tip, it can’t do that job reliably. The result? Your pilot light keeps going out, your water stays cold, and you’re left wondering what went wrong.
The good news is that a dirty thermocouple is usually a maintenance problem, not a replacement problem. Cleaning it costs nothing but a little time.
I’m Chris Woods, owner of Woods Comfort Systems, a third-generation HVAC and plumbing company serving Central Texas since 1956, and a dirty thermocouple water heater is one of the most common issues my team diagnoses on service calls. In this guide, I’ll walk you through exactly how to clean it safely and get your hot water back.
Understanding Your Water Heater Thermocouple
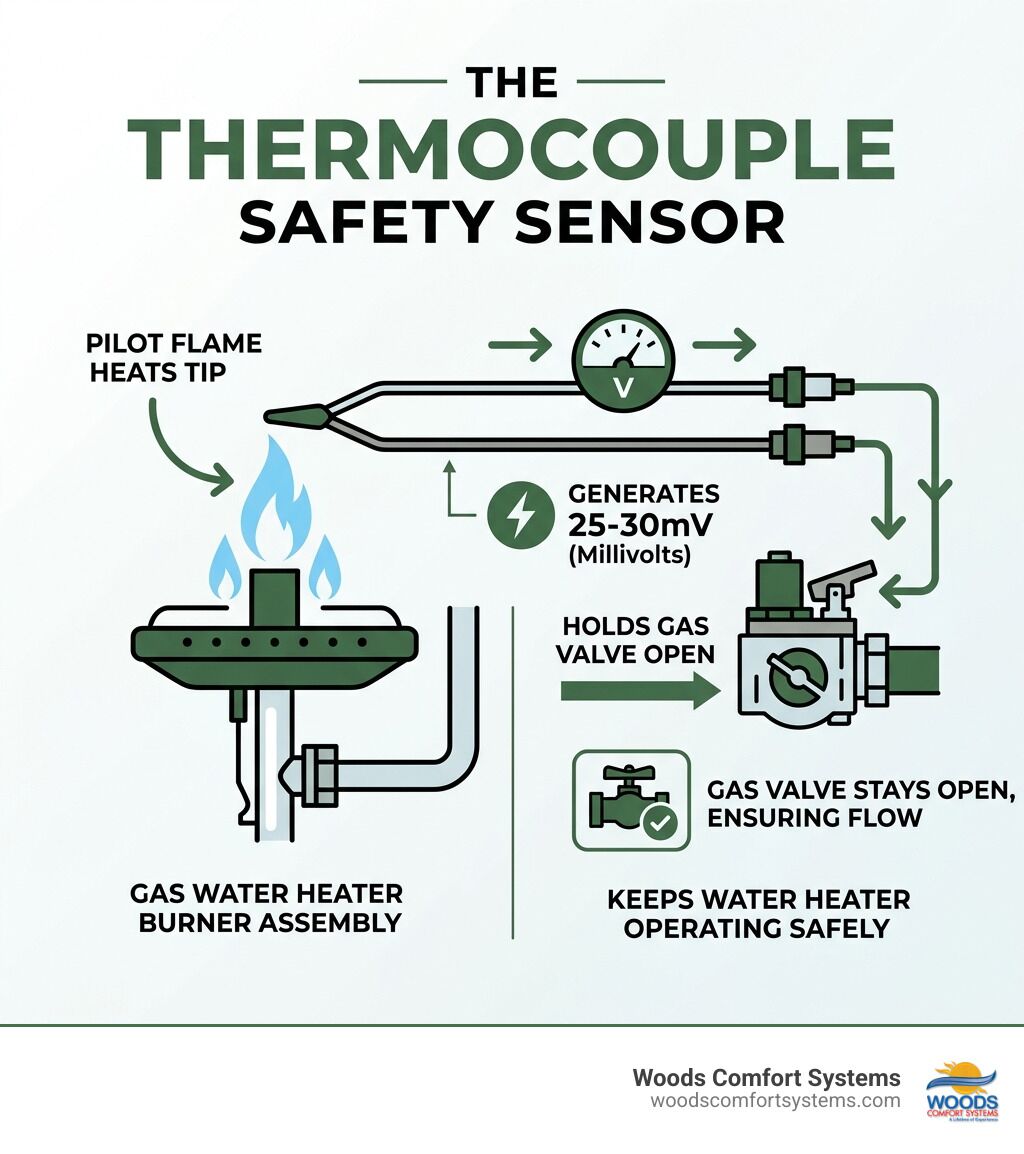
To fix a dirty thermocouple water heater, you first need to understand what this little part actually does. Think of the thermocouple as the “guardian” of your gas system. It is a simple safety device consisting of two different metal wires joined at one end.
When the pilot flame hits the tip of the thermocouple, it creates a physical phenomenon known as the Seebeck effect. This process generates a tiny amount of electricity, usually between 25 and 30 millivolts. While that isn’t enough to power your TV, it is exactly enough to create an electromagnetic pull that holds the gas valve open.
If the pilot light goes out, the thermocouple cools down, the electricity stops flowing, and the gas valve snaps shut. This prevents your home from filling with unburned gas. It’s a brilliant, fail-safe design, but it relies entirely on the thermocouple’s ability to “feel” the heat. For more technical details on these components, you can check out this how to fix water heater thermocouple issues: detailed guide or explore our more info about water heater services.
Thermocouple vs. Thermopile: What is the Difference?
While most residential tank-style water heaters in San Marcos and New Braunfels use a standard thermocouple, you might encounter a “thermopile” in newer or high-efficiency models.
A thermopile is essentially a bundle of several thermocouples wired in series. Because there are more of them, they generate a much higher voltage, typically around 750 millivolts. This extra power is often used to operate electronic thermostats or digital displays without needing an external power plug.
| Feature | Thermocouple | Thermopile |
|---|---|---|
| Voltage Output | 25–30 Millivolts | 500–750 Millivolts |
| Appearance | Single copper lead with a silver tip | Thicker lead, often with a larger cylindrical head |
| Common Use | Standard standing pilot water heaters | Power-vented or electronic ignition models |
| Primary Goal | Safety (closing the gas valve) | Safety + Powering internal electronics |
Signs You Have a Dirty Thermocouple Water Heater
How do you know if your issues are caused by a dirty thermocouple water heater rather than a broken gas valve or a draft? Your water heater will usually give you a few “cries for help” before it quits entirely.
The most obvious sign is a pilot light that won’t stay lit. If you hold the pilot button down, the flame burns bright, but the second you release the button, the flame disappears. This happens because the buildup on the thermocouple is insulating it from the heat, preventing it from reaching the necessary temperature to generate those 30 millivolts.
Another warning sign is the color of your pilot flame. A healthy pilot flame should be crisp and blue. If you see a lazy, yellow, or orange flame, it indicates incomplete combustion. This “dirty” burn creates soot that quickly coats the thermocouple. Furthermore, a yellow flame can be a sign of carbon monoxide production, which is a serious safety risk. If you notice these symptoms, causes, and replacement of a bad thermocouple in a water heater, it’s time to act. You can also read more about why your pilot light keeps going out on our blog.
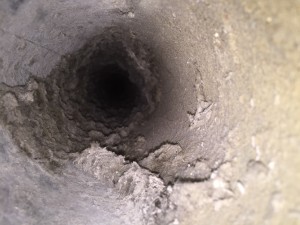
Common Causes of Buildup and Oxidation
Why does a thermocouple get dirty in the first place? It lives in a harsh environment. Over time, several factors contribute to buildup:
- Dust and Debris: Since water heaters are often located in garages or basements in the Austin and San Antonio areas, they pull in dusty air for combustion. This dust bakes onto the hot metal tip.
- Oxidation: Constant exposure to high heat causes the metal to oxidize, creating a thin layer of non-conductive “crust.”
- Gas Impurities: Minor impurities in the natural gas or propane can leave behind a sooty residue.
- Moisture: Humidity in Central Texas can lead to minor corrosion on the terminals where the thermocouple connects to the gas valve.
If you suspect your system is struggling with more than just a dirty sensor, learn how to tell if your water heater is clogged to rule out sediment issues.
Step-by-Step Guide: How to Clean a Dirty Thermocouple Water Heater
Cleaning a dirty thermocouple water heater is a straightforward DIY task, but because you are working with gas and fire, safety is the absolute priority. If you feel uncomfortable at any point, don’t hesitate to call us, we’ve been doing this for over 60 years and are happy to help.

Safety Precautions and Tools Needed for a Dirty Thermocouple Water Heater
Before you touch a single bolt, follow these safety steps:
- Shut off the Gas: Turn the gas control knob on the water heater to the “OFF” position. Additionally, close the manual shut-off valve on the gas line leading to the unit.
- Let it Cool: The burner chamber gets incredibly hot. Wait at least 5 to 10 minutes for the components to be cool to the touch.
- Ventilation: Ensure the area is well-ventilated.
Tools you will need:
- An open-end wrench (usually 7/16″, 3/8″, or 1/2″)
- Fine-grit sandpaper (400 to 600 grit) or an emery cloth
- A piece of fine steel wool
- A clean, lint-free cloth
- A can of compressed air (optional but helpful)
For more on staying safe during home repairs, visit our DIY repair safety tips page.
Step-by-Step: Cleaning a Dirty Thermocouple Water Heater
Now that you’re prepared, follow these steps to restore your hot water:
Step 1: Access the Burner Assembly
Remove the outer and inner access panels at the bottom of the water heater. Some modern units have a sealed glass viewing port; for these, you may need to unscrew the entire burner door.
Step 2: Take a Photo
This is the most important “pro tip” I can give you. Take a clear photo of how the thermocouple, pilot tube, and main burner tube are connected to the gas valve. This ensures you can put everything back exactly where it belongs.
Step 3: Disconnect the Leads
Using your wrench, unscrew the three connections from the bottom of the gas control valve: the main burner supply line, the pilot supply tube, and the thermocouple lead (the thin copper wire).
Step 4: Remove the Burner Assembly
Carefully slide the entire burner assembly out of the combustion chamber. Be gentle so you don’t bend the tubes.
Step 5: Clean the Thermocouple
Locate the thermocouple (the pencil-shaped copper probe next to the pilot burner). Use your fine sandpaper or steel wool to gently scrub the tip. You aren’t trying to grind the metal down; you just want to remove the black soot and grey oxidation until you see shiny copper or silver metal. For a detailed visual, see how to clean the thermocouple on a water heater.
Step 6: Polish and Wipe
Wipe the tip with your lint-free cloth to remove any leftover grit or dust. If you have compressed air, blow out the pilot light tube as well to ensure a strong, blue flame.
Step 7: Reassemble
Slide the burner back in, using your photo as a guide. Reconnect the three lines to the gas valve. Be careful not to cross-thread the fittings; they should be “snug,” but do not over-tighten them, as you could crack the gas valve housing.
Testing and Relighting After Cleaning
Once everything is back together, it’s time to see if your hard work paid off. Testing the unit is the only way to confirm that the dirty thermocouple water heater issue is actually resolved.
How to Relight the Pilot Light Safely
Every water heater has slightly different instructions (usually printed on the side of the tank), but the general process is:
- Turn the gas control knob to “Pilot.”
- Press and hold the knob (or the separate pilot button) down. This manually forces gas to the pilot burner.
- While holding the button, click the igniter (striker) until the flame lights.
- The 30-Second Rule: Continue holding the pilot button for at least 30 to 60 seconds. This gives the cleaned thermocouple enough time to heat up and start producing electricity.
- Slowly release the button. If the flame stays lit, congratulations! Turn the knob to “ON.”
If the pilot goes out immediately, you may have a loose connection or the thermocouple might be beyond saving. For more help, check out our troubleshooting pilot light issues guide. While you’re at it, this is a great time to perform other maintenance; see our guide to draining your water heater to keep it running efficiently.
Testing the Millivolt Output
If you have a multimeter, you can perform a professional-grade test. Set your multimeter to the DC millivolts (mV) setting.
With the pilot lit, touch one probe to the copper lead and the other to the silver end that screws into the gas valve. A healthy, clean thermocouple should read between 20 and 30 millivolts. If it reads below 20mV despite being clean, the internal sensor is likely worn out, and cleaning won’t fix the problem.
Maintenance and When to Call a Professional
We recommend an annual maintenance check for all gas appliances. In dusty environments, common in areas like Buda or Kyle, inspecting and cleaning your thermocouple every 6 months can prevent unexpected cold showers.
A standard thermocouple typically lasts between 5 and 10 years. If your water heater is approaching its 10th birthday, you might find yourself cleaning it more and more frequently. At that point, the metal has likely suffered “operational fatigue” from thousands of heating and cooling cycles.
When to Replace vs. Clean the Thermocouple
Cleaning is a great first step, but sometimes replacement is the only safe option. You should replace the thermocouple if:
- Visible Pitting: If the metal tip looks “eaten away” or has deep pits in it.
- Heavy Corrosion: If the copper lead is green or brittle.
- Frequent Outages: If you have to clean it every month just to keep it working.
- Cracks: Any visible cracks in the sensor tip can lead to gas leaks or electrical failure.
The good news? A new thermocouple is a very affordable part, usually costing between $5 and $20 at any hardware store in San Marcos or Austin. If you’re debating whether to keep fixing an old unit or start fresh, read our repair vs replacement guide. Also, watch for these signs you need professional repair.
Preventing Future Buildup and Common Mistakes
To extend the life of your thermocouple and prevent a dirty thermocouple water heater in the future, keep these tips in mind:
- Clean the Area: Don’t store lint-producing items (like a dryer) or chemicals near the water heater. Sweep the floor around the unit regularly to reduce the amount of dust pulled into the burner.
- Don’t Over-tighten: When reconnecting the thermocouple to the gas valve, finger-tighten it first, then give it just a quarter-turn with a wrench. Over-tightening can damage the sensitive electrical contact.
- Check Ventilation: Ensure the “combustion air” openings at the bottom of the heater aren’t blocked by boxes or debris.
- Avoid Bending: Try not to make sharp kinks in the copper lead wire, as this can break the internal wire.
For a full list of maintenance tasks, check out our water heater tune-up signs page.
Frequently Asked Questions about Dirty Thermocouples
Can I clean the thermocouple without removing the burner?
In some older models, you can reach in with a long piece of steel wool or a small wire brush through the access door. However, it is difficult to do a thorough job this way. To ensure you remove all the oxidation, removing the burner assembly is usually necessary.
How often should I clean my water heater thermocouple?
We suggest a visual inspection every 3–4 months and a thorough cleaning once a year. If you live in a particularly dusty area or have a very old unit, every 6 months is a safer bet.
Why does my pilot light go out as soon as I release the knob?
This is the classic sign of a dirty thermocouple water heater. The thermocouple isn’t sending a strong enough electrical signal to the gas valve to tell it to stay open. If cleaning doesn’t fix this, the thermocouple is likely defective and needs replacement.
Conclusion
A dirty thermocouple water heater doesn’t have to mean a ruined weekend or an expensive emergency plumbing bill. By following the steps above, most homeowners in San Marcos, Kyle, and New Braunfels can get their hot water flowing again with just a bit of sandpaper and some patience.
At Woods Comfort Systems, we take pride in our 60+ years of serving Central Texas. As a family-owned business, we treat our customers like royalty, offering 24/7 emergency service when things go wrong. Whether you need a quick thermocouple fix, a full water heater replacement, or a seasonal HVAC tune-up, our team is ready to help.
Don’t let a small piece of soot stand between you and a hot shower. Schedule your water heater service today and let the experts at Woods Comfort Systems ensure your home stays comfortable all year long!
Whether you require installation, repair, or maintenance, our technicians will assist you with top-quality service at any time of the day or night. Take comfort in knowing your indoor air quality is the best it can be with MOE heating & cooling services Ontario's solution for heating, air conditioning, and ventilation that’s cooler than the rest.
Contact us to schedule a visit. Our qualified team of technicians, are always ready to help you and guide you for heating and cooling issues. Weather you want to replace an old furnace or install a brand new air conditioner, we are here to help you. Our main office is at Kitchener but we can service most of Ontario's cities
Source link