
Why Your Generator Won’t Start (And How to Fix It Fast)
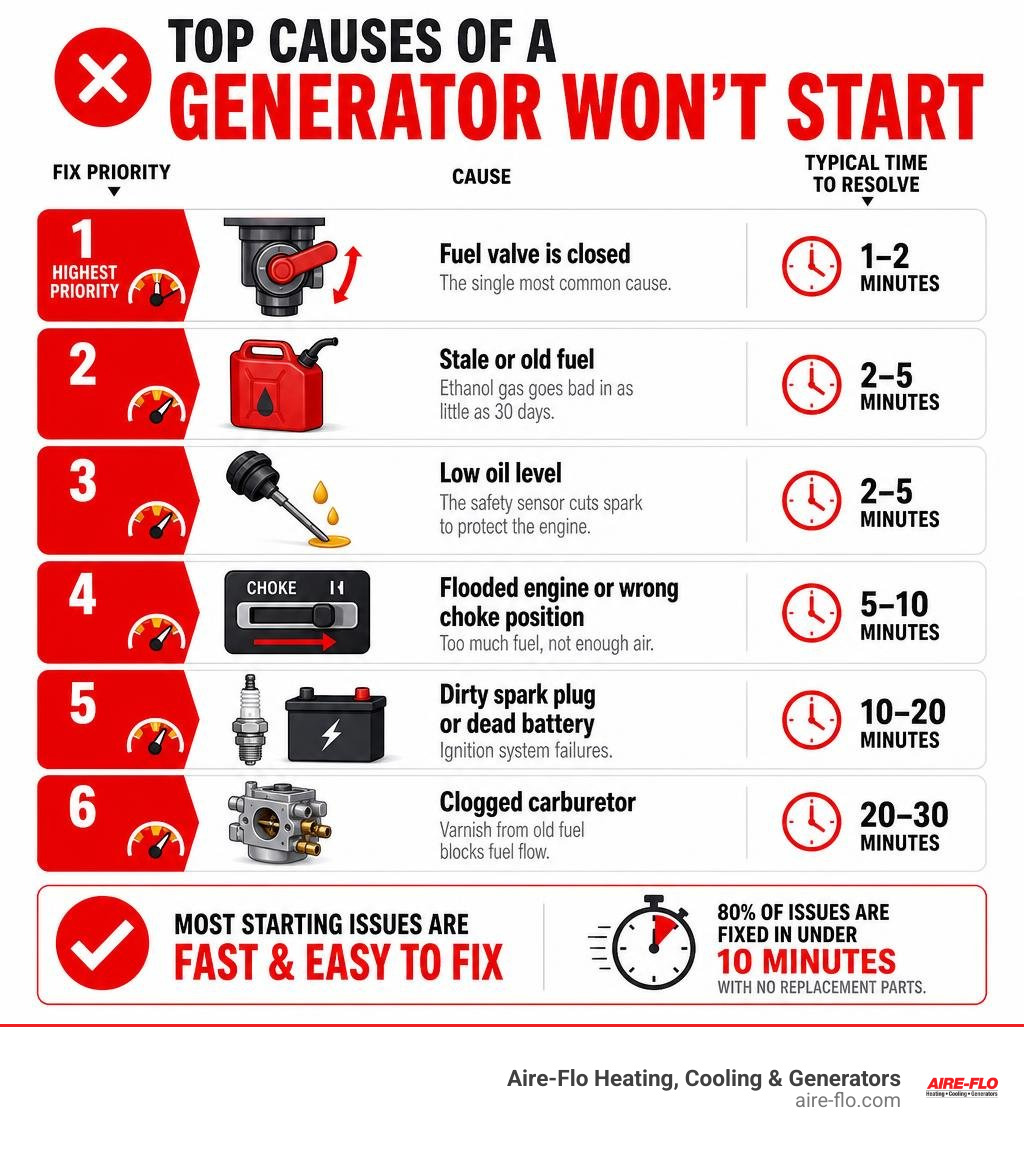
If your generator won’t start, the problem is almost always something simple. Here are the most common causes, in order of how often they happen:
- Fuel valve is closed – the single most common cause
- Stale or old fuel – ethanol gas goes bad in as little as 30 days
- Low oil level – the safety sensor cuts spark to protect the engine
- Flooded engine or wrong choke position – too much fuel, not enough air
- Dirty spark plug or dead battery – ignition system failures
- Clogged carburetor – varnish from old fuel blocks fuel flow
The good news: Most generator starting problems are fixed quickly with no replacement parts.
Power outages don’t give you a warning. One Columbus homeowner pulled a generator out of the garage after an ice storm, yanked the cord many times, and was ready to call for a replacement before realizing the fuel valve was simply closed. One flip of a lever and it started on the first pull.
That scenario is far more common than most people expect. The fixes are usually free, fast, and require no special tools.
At Aire-Flo Heating, Cooling & Generators, our team has spent decades serving Central Ohio homeowners and has seen nearly every reason a generator won’t start. This checklist covers them all, starting with the easiest fixes first.
Quick Troubleshooting: What to Check First When Your Generator Won’t Start
When your home loses power, tension runs high. Before you grab your toolbox or assume your engine is permanently broken, perform a quick visual walkaround. Our service technicians in Columbus, Dublin, and Hilliard find that most starting failures stem from basic operational oversights.
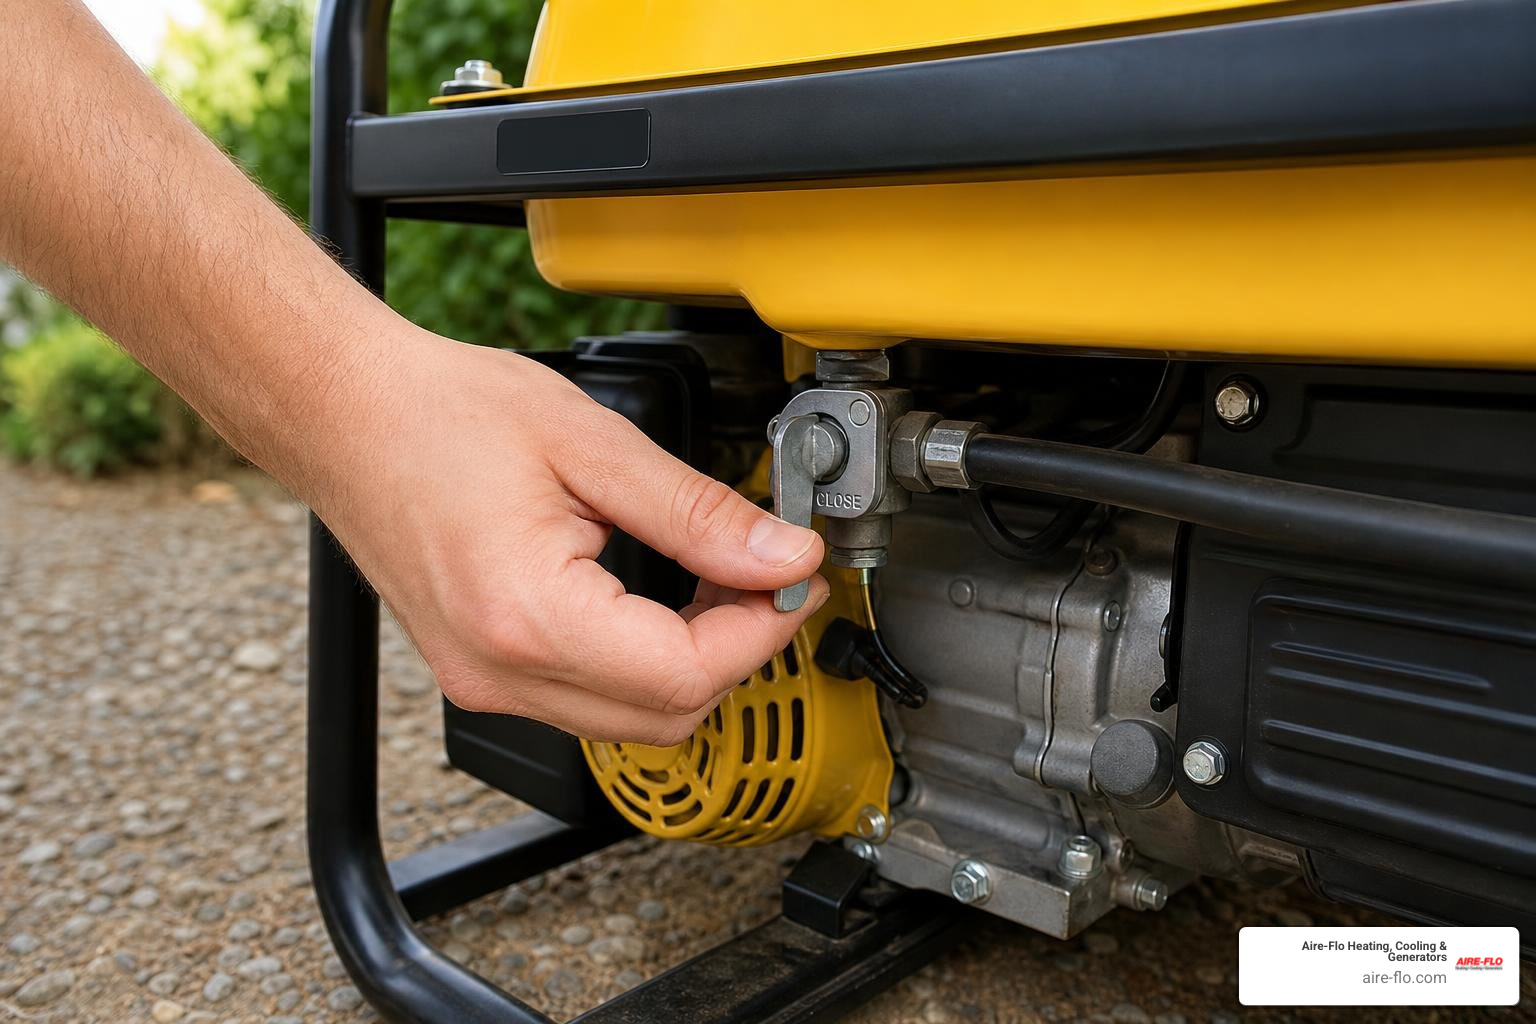
First, verify the position of the fuel shutoff valve. This manual lever controls the flow of gasoline from the fuel tank down into the carburetor. During storage, you should always keep this valve closed to prevent fuel from leaking. However, forgetting to open it before starting is incredibly common. Ensure the lever sits parallel to the fuel line, which indicates it is fully open.
Next, check the main engine switch or kill switch. It sounds obvious, but this switch must be in the ON or RUN position. If your generator features an electric starter, a dead battery might prevent the starter motor from cranking the engine. If you hear a rapid clicking sound when you press the start button, the battery lacks the voltage to turn the starter. You can usually bypass this temporarily by using the manual recoil pull starter.
Another critical step is checking for connected electrical loads. Never attempt to start a generator with extension cords or appliances plugged into the outlets. Starting under load forces the engine to fight against immediate electrical resistance, which can prevent it from turning over or damage your connected electronics. Always unplug everything before starting, allow the engine to warm up for a few minutes, and then plug your appliances in one at a time.
Finally, inspect the air filter. A heavily clogged air filter restricts the air flowing into the engine, creating an overly rich fuel mixture that floods the combustion chamber. Pop open the plastic air filter housing, remove the foam or paper element, and check for dirt buildup. If the foam filter is dirty, wash it with warm soapy water, let it dry completely, squeeze a few drops of clean engine oil onto it, and reinstall it.
If you want to understand how your portable unit compares to a dedicated standby system, our generator installation and sales team can help you compare automatic transfer switches, fuel options, and seamless power transitions for homes across Central Ohio.
Fuel System Failures: Stale Gas and Clogged Carburetors
If your generator has fuel, the switch is on, and the outlets are empty, but the engine still refuses to fire, you are likely dealing with a fuel system failure. Primary fuel system issues, such as closed valves and stale fuel, cause many generator starting failures.
Modern gasoline is not designed for long-term storage. Most fuel you buy at local gas stations contains up to 10% ethanol. While ethanol works fine in daily-driven cars, it causes major problems in small engines. Ethanol is hygroscopic, meaning it actively absorbs moisture from the surrounding air.
Within just 30 days, ethanol-blended gas begins to degrade, separate, and form a sticky, gummy varnish inside your generator’s fuel system. This varnish quickly coats the tiny passages inside your carburetor, blocking the flow of fuel. If you left untreated fuel in your generator’s tank over the winter, that old fuel is almost certainly the reason your engine will not fire.
To prevent this headache, we recommend adding a high-quality fuel stabilizer to your gas can immediately after filling it at the pump. A good stabilizer can keep standard gasoline fresh for up to six months. However, the absolute best practice for emergency equipment is to use specialized, pre-packaged non-ethanol fuel, which can remain stable for up to two years without degrading.
Homeowners weighing repair against a more permanent backup power plan can also use the ultimate guide to home electric backup generators to understand how standby systems differ from portable units, especially when stale fuel keeps causing problems.
How to Tell If Stale Gas is Why Your Generator Won’t Start
You do not need laboratory equipment to diagnose bad fuel. A simple sensory inspection will tell you everything you need to know.
Start with a smell test. Remove the gas cap and carefully sniff the opening of the fuel tank. Fresh gasoline has a strong, sharp, and distinctive chemical odor. Stale gasoline loses its volatile compounds and smells distinctly sweet, sour, or like old paint thinner and varnish. If the tank smells like a wood-finishing shop, your fuel is stale.
Next, perform a visual inspection. If your generator has a clear fuel line or a built-in fuel sight glass, look at the color of the gasoline. You can also drain a small amount of fuel from the bottom of the carburetor bowl into a clean glass container. Fresh gasoline is clear to very light yellow. As gasoline degrades and oxidizes, it darkens significantly, turning a deep amber, orange, or even brown color. If you see water droplets sitting at the very bottom of your glass container, phase separation has occurred, and the fuel is ruined.
Cleaning a Clogged Carburetor to Restore Fuel Flow
Stale gasoline can cause carburetor-related starting issues. When varnish blocks the microscopic holes inside the carburetor jets, the engine cannot draw enough fuel to mix with the incoming air. Fortunately, you can often clean a clogged carburetor quickly without buying any new parts.
First, locate the carburetor, which sits directly behind the air filter housing. Place a small rag or cup underneath the carburetor bowl to catch any spilling fuel. Locate the small drain screw at the bottom of the brass bowl and loosen it with a wrench or screwdriver. Let the old fuel drain out completely. If the fuel flowing out is dark or contains flecks of rust and debris, the carburetor requires a deeper clean.
To clean the internal jets:
- Remove the center bolt holding the brass carburetor bowl in place and pull the bowl off.
- Locate the brass main jet, which sits vertically inside the center stem of the carburetor.
- Spray the main jet thoroughly with aerosol carburetor cleaner.
- Insert a very fine wire, like a 0.008 inch wire or a single strand of wire stripped from a twist-tie, directly into the center hole of the jet to clear any physical blockages.
- Locate the idle pilot jet, which usually sits under a small plastic screw on the top or side of the carburetor body, and clean it in the same manner.
- Reassemble the bowl, tighten the center bolt, and verify that the black rubber gasket seals correctly to prevent leaks.
Electrical and Ignition Issues: Spark Plugs, Batteries, and Chokes
While fuel issues dominate small engine troubleshooting, electrical and ignition components can also cause starting failures. Your generator requires three elements to run: fuel, air, and a strong electrical spark. If any of these are missing, the engine will crank endlessly without ever catching fire.
If you own a standby generator that struggles to start during power outages in Delaware, Marysville, or Upper Arlington, the battery is often the most common culprit. Standby generators rely on a 12-volt battery to drive the automatic starter motor. Over time, constant charging and exposure to extreme Ohio temperatures degrade the battery’s capacity.
This often leads to the “second-start” phenomenon, where a standby generator fails to start on its initial automated attempt but fires up successfully on the second try. This occurs because the electrical load of the first cranking attempt can warm up the battery’s internal chemistry, lowering its internal resistance and providing just enough extra power for the second attempt.
For portable generators, electrical issues are often simpler, such as a disconnected spark plug wire, a faulty ignition coil, or a broken on/off switch. If you are dealing with a portable unit that sat in a damp shed in Delaware, Ohio, our generator repair in Delaware, Ohio article explains how local humidity and rust can affect electrical connections and ground wires.
Standby systems have different diagnostic needs than portable units, especially when the weekly self-test fails or the battery keeps losing charge. Our broader HVAC and generator services team can inspect standby generator electrical connections, transfer switch concerns, and related comfort-system issues during a scheduled service visit.
Checking for Spark on a Generator That Won’t Start
Testing for spark is a straightforward process that takes less than five minutes. First, locate the spark plug at the front or top of the engine block. Pull the thick rubber spark plug boot off the terminal. Use a standard spark plug wrench to turn the plug counterclockwise and remove it from the cylinder head.
Inspect the tip of the spark plug. If the electrode is covered in heavy black carbon deposits, wet with gasoline, or physically eroded, the plug cannot create a strong spark. Clean any carbon off with a wire brush and spray it with carburetor cleaner. If the plug is wet with fuel, your engine is flooded. Let the cylinder dry out before reinstalling the plug. Use a feeler gauge to verify the electrode gap matches your manufacturer specifications, which is typically 0.030 inches.
To test for spark visually:
- Push the spark plug firmly back into the rubber spark plug boot.
- Hold the metal threaded body of the spark plug firmly against a clean, unpainted metal part of the engine block.
- Turn the generator’s engine switch to the ON position.
- Pull the manual starter cord firmly while watching the tip of the spark plug.
- Look for a bright, snappy blue spark jumping across the electrode gap.
If you see a strong blue spark, your ignition system is working perfectly, and your starting issue lies elsewhere. If you see a weak yellow spark, or no spark at all, the spark plug is fouled, the ignition coil has failed, or your low oil sensor is grounding out the system.
Troubleshooting Automatic Choke and Pull Cord Problems
The choke lever restricts the amount of air entering the engine, creating a temporary fuel-rich mixture that helps a cold engine start. Once the engine warms up, the choke must open to allow normal airflow.
Many modern portable and standby generators use an automatic choke system to manage this process without user input. However, automatic chokes are prone to mechanical failures.
Our service records indicate that many automatic choke failures are caused by a stuck or binding mechanical linkage. Over time, dirt, dust, and light rust coat the thin metal rods connecting the choke solenoid to the carburetor. If this linkage binds, the choke remains stuck open during a cold start, preventing the engine from firing. Spraying the linkage with a light lubricant like WD-40 and cycling it manually usually solves the problem.
Automatic choke failures can also stem from a failed bimetal thermostat. This thermal spring expands as the engine warms up, gradually opening the choke plate. If the spring breaks or loses its tension, the choke stays closed, flooding the warm engine with too much fuel.
If your generator uses a manual pull cord and the cord is incredibly hard to pull or feels completely locked, do not force it. This symptom usually points to hydraulic lock. If a generator is tipped over during transport, or if the carburetor needle valve leaks, engine oil or gasoline can seep past the intake valve and fill the combustion chamber. Because liquids do not compress, the piston cannot complete its stroke, locking the engine. To fix this, remove the spark plug and pull the starter cord several times. This safely expels the trapped liquid out of the open spark plug hole.
Few things are more frustrating than a generator that fires up, runs beautifully for three seconds, and then abruptly dies. This start-and-stop cycle is incredibly common, and it usually points to a few specific safety sensors or fuel delivery issues.
When a generator dies within five seconds of starting, the most likely culprit is the low oil shutdown sensor. Modern small engines feature a float switch inside the crankcase. If the oil level drops below a safe threshold, the switch grounds out the ignition system, cutting the spark to prevent catastrophic engine damage.
However, this sensor is highly sensitive. If you operate your generator on a sloped driveway, a patch of uneven grass, or a hilly backyard in Canal Winchester or Pickerington, the oil shifts to one side of the crankcase. This triggers the low oil sensor even if your oil level is completely full. Always operate your generator on a flat, level surface.
If the generator starts, runs for two to ten minutes, and then dies, you are likely dealing with a vacuum lock in the fuel tank. As the engine consumes gasoline, air must enter the tank to take its place. This airflow is managed by a small vent in the gas cap. If this vent becomes clogged with dirt or debris, a vacuum forms inside the tank, stopping the flow of fuel to the carburetor. You can test this easily: the next time your generator starts to sputter and die, loosen the gas cap. If the engine immediately recovers and runs smoothly, your gas cap vent is blocked and needs to be cleaned or replaced.
To help you narrow down the exact cause based on how long your engine runs, we have put together this diagnostic timeline:
| Run Time Before Dying | Most Likely Cause | Primary Culprit | Quick Resolution |
|---|---|---|---|
| 2 to 5 seconds | Low oil safety shutdown | Low oil level or sloped ground | Add oil; move generator to level ground |
| 5 to 10 seconds | Fuel starvation (idle circuit) | Clogged carburetor pilot jet | Clean pilot jet with fine wire and spray |
| 2 to 10 minutes | Fuel tank vacuum lock | Blocked gas cap vent | Loosen gas cap; clean or replace cap |
| 10 to 20 minutes | Ignition system thermal failure | Cracked ignition coil | Let engine cool; replace ignition coil |
Frequently Asked Questions About Generator Starting Problems
Can low oil cause a generator not to start?
Yes, low oil is one of the most common reasons a generator will not start, accounting for roughly 20% of all starting failures. Almost all modern portable and standby generators feature an automatic low oil shutdown sensor. This safety switch monitors the oil level in the crankcase. If the oil level is too low, the sensor cuts off the electrical path to the spark plug, preventing the engine from creating a spark.
If your generator refuses to fire, always pull the oil dipstick, wipe it clean, reinsert it, and check the level. Fill the crankcase with the manufacturer’s recommended oil viscosity (usually SAE 10W-30 or 5W-30 synthetic for cold weather) until the oil reaches the very top thread of the fill plug. Also, ensure the generator sits on a perfectly level surface, as even a slight slope can trick the sensor into shutting down the engine.
Why does my generator crank but won’t fire?
If your generator’s starter motor cranks the engine over energetically, or if the pull cord pulls freely but the engine never actually fires up, you are missing either fuel or spark.
First, check for a flooded engine. If you have pulled the starter cord repeatedly with the choke fully closed, the combustion chamber may be saturated with raw gasoline. You can diagnose this by removing the spark plug. If the tip of the plug is wet with fuel and you smell strong gasoline, the engine is flooded. Leave the spark plug out for 10 to 15 minutes to allow the excess fuel to evaporate, clean the plug tip, and try starting again with the choke open.
If the engine is not flooded, verify that fuel is actually reaching the carburetor by loosening the bowl drain screw. If no fuel drains out, you have a clogged fuel line, a blocked fuel filter, or a closed fuel valve.
When should I replace my generator instead of repairing it?
Deciding whether to repair or replace a broken generator comes down to the age of the machine and the nature of the failure. If your starting issue is caused by a dirty carburetor, a bad spark plug, or a dead battery, these are cheap, simple fixes that are always worth performing.
However, if your generator engine runs fine but fails to generate electricity, you may be dealing with internal alternator damage. Issues like a failed automatic voltage regulator (AVR), worn brushes, or lost residual magnetism can stop the unit from delivering power even when the engine itself sounds normal.
If the internal copper rotor or stator windings are physically burned or shorted out, repairing them requires complete disassembly of the alternator head and hours of specialized labor. For consumer-grade portable generators over ten years old, the cost of replacing these major electrical windings or rebuilding a seized engine block often exceeds the price of a brand-new generator. In those cases, upgrading to a modern, highly efficient unit is the smarter financial choice.
Conclusion
A generator is your home’s ultimate safety net during a severe weather emergency. However, like any machine, it requires regular attention to perform when you need it most. By practicing basic preventative maintenance, such as using fresh non-ethanol fuel, adding a stabilizer, checking your oil before every run, and performing a monthly test run under load for 15 minutes, you can ensure your system starts reliably every single time.
If you are tired of wrestling with heavy pull cords, storing gas cans in your garage, and worrying whether your portable unit will start during the next big storm, it might be time to consider a permanent solution. A professionally installed standby generator sits permanently outside your home, runs on your existing natural gas or liquid propane line, and starts automatically within seconds of a power outage.
For over 75 years, the team at Aire-Flo Heating, Cooling & Generators has provided trusted, top-rated power generation services across the Columbus, Ohio area, including Dublin, Hilliard, Delaware, Worthington, and Upper Arlington. We stand behind our work with a 100% satisfaction guarantee.
If your existing standby generator is failing its weekly self-test or needs professional diagnostic work, do not wait for the next major storm to hit. Please contact our professional generator technicians and schedule a comprehensive maintenance visit today.
Whether you require installation, repair, or maintenance, our technicians will assist you with top-quality service at any time of the day or night. Take comfort in knowing your indoor air quality is the best it can be with MOE heating & cooling services Ontario's solution for heating, air conditioning, and ventilation that’s cooler than the rest.
Contact us to schedule a visit. Our qualified team of technicians, are always ready to help you and guide you for heating and cooling issues. Weather you want to replace an old furnace or install a brand new air conditioner, we are here to help you. Our main office is at Kitchener but we can service most of Ontario's cities
Source link