When your AC runs all afternoon and the house still feels sticky, the problem often starts where most homeowners never look. how to clean your ac coils matters a lot in Mesa because our dust, heat, and long cooling season punish neglected systems fast.
Your Guide to AC Coil Cleaning
A lot of homeowners call when the system is running, the thermostat is dropping, and somehow the rooms still don’t feel right. In the Phoenix Valley, that usually means the equipment is moving air, but the coils are struggling to transfer heat the way they should.
That’s why learning how to clean your ac coils is more than a DIY chore. It’s practical maintenance that helps your system keep up when summer stops being forgiving. If you like reading broader upkeep advice alongside this topic, this complete guide to AC and HVAC maintenance gives useful general context on routine system care.
Clean coils don’t make a bad AC new again, but they do remove one of the most common reasons a decent system starts acting weak.
Homeowners here usually deal with two different cleaning jobs. The outdoor condenser coil gets hammered by desert dust, yard debris, and that fine powder that sticks in the fins. The indoor evaporator coil collects household dust and airborne particles, and it needs a lighter touch.
Why Cleaning Your AC Coils in Arizona is Non-Negotiable
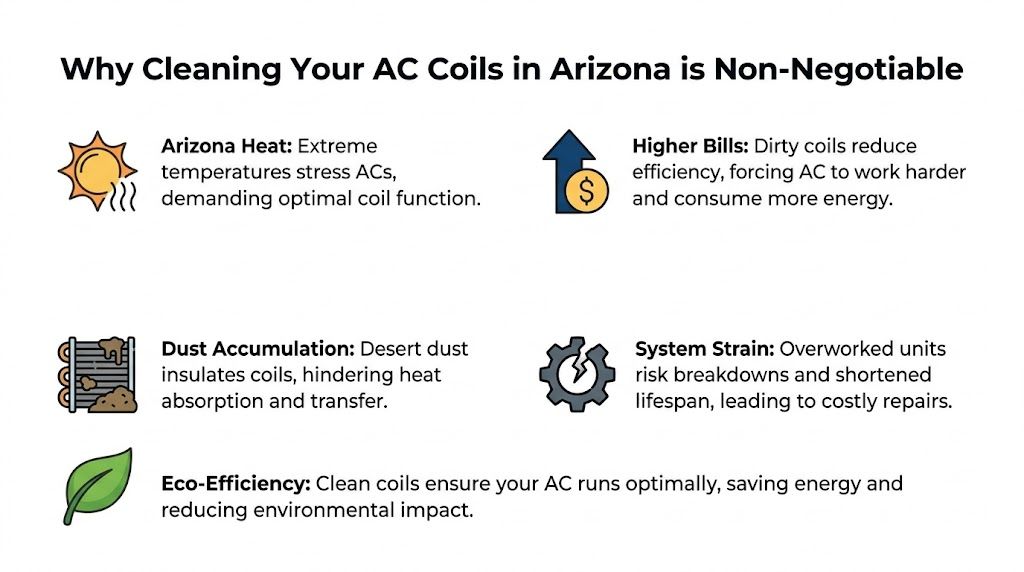
Arizona doesn’t give your air conditioner much rest. In Mesa, systems work through long stretches of extreme heat, and any restriction in heat transfer shows up quickly as longer run times, weaker cooling, and higher electric bills.
Dirty coils aren’t a small issue. They directly interfere with how the system removes heat from your house and dumps that heat outdoors. When the coil surface gets insulated by grime, the compressor and fan have to work harder just to keep up.
What dirt actually does to performance
According to this coil cleaning reference, dirty AC coils can slash system efficiency by up to 40%, and the U.S. Department of Energy notes that 0.042 inches of dirt can reduce efficiency by 21%. In Phoenix conditions, that can mean hundreds of extra dollars in electricity costs annually for a homeowner.
That lines up with what technicians see in the field. The unit isn’t always broken. It’s often overworked.
Practical rule: If the AC sounds normal but cools poorly during peak heat, always suspect restricted airflow or dirty coils before assuming the whole system is failing.
Why Arizona is harder on coils than most places
National advice often says to clean coils periodically and move on. That’s too casual for the Valley. Our outdoor units sit in blowing dust, dry debris, pollen, and alkaline residue. Indoor coils also get hit harder because systems run so many hours that every bit of airborne dirt has more chances to collect.
A few local conditions make coil cleaning more urgent:
- Long runtimes: Your system doesn’t get many breaks during summer.
- Fine desert dust: It packs into condenser fins instead of just settling on the surface.
- Alkaline buildup: Residue can cling to the coil and needs the right cleaner and rinse method.
- Older homes: Access can be awkward, especially in attic or closet installations.
If you want more ways to reduce strain on your system during cooling season, these HVAC energy saving tips are worth reviewing.
What homeowners usually notice first
Many homeowners don’t walk outside, inspect a condenser, and say, “Yep, dirty coil.” They notice symptoms:
- Warmer supply air: The vents are blowing, but the air doesn’t feel as cold.
- Longer cycles: The AC seems to run and run.
- Higher bills: The power usage climbs before the unit fully quits.
- Summer breakdowns: The system finally fails on the worst possible day.
That’s why coil cleaning isn’t optional maintenance in Mesa. It’s one of the simplest ways to protect cooling performance before the heat exposes every weakness in the system.
Gathering Your Tools and Safety Gear
Most coil cleaning mistakes happen before the cleaning even starts. Homeowners grab the wrong hose nozzle, the wrong cleaner, or no protective gear at all, then turn a maintenance job into a repair call.
Patience matters here. Aluminum fins bend easily, sheet metal edges are sharp, and electrical components don’t forgive sloppy work. If you prep well, the job is much safer and a whole lot more effective.
What you actually need
Here’s a working checklist that keeps the job practical, not overcomplicated.
| Item | Purpose | Notes |
|---|---|---|
| Work gloves | Protect hands from sharp cabinet edges and coil fins | Good grip matters. For hand protection standards and materials, these cut-resistant gloves are a useful reference |
| Safety glasses or goggles | Protect eyes from debris and cleaner splash | Especially important when brushing overhead or using foaming cleaner |
| Screwdriver or nut driver | Remove access panels | Match the fastener type before starting so you don’t strip screws |
| Soft nylon brush | Loosen surface dirt from fins | Don’t use a stiff wire brush |
| Vacuum with brush attachment | Remove dry debris gently | Best for indoor coil work and loose dust |
| Fin comb | Straighten bent condenser fins | Use gently, only where needed |
| Garden hose with gentle flow | Rinse outdoor condenser coil | Keep pressure low |
| Non-corrosive foaming condenser cleaner | Break up stubborn outdoor buildup | Use one compatible with aluminum coils |
| No-rinse evaporator coil cleaner | Clean indoor coil safely | Better suited for indoor access areas |
| Gloves and drop cloths | Keep cleaner off skin and protect nearby surfaces | Helpful around indoor equipment |
| Spray bottle | Light indoor rinse if needed | Never substitute with a hose indoors |
| Flashlight | See into coil faces and drain areas | Especially useful in attic or closet installations |
Safety steps before touching anything
You don’t start by spraying. You start by shutting power off and confirming it stays off.
- Turn off the breaker: Cut power to the indoor and outdoor equipment before opening anything.
- Use hand protection: Cabinet metal can slice you faster than most homeowners expect.
- Dress for the space: Attics in Arizona get brutal, so pace yourself and stay hydrated.
- Protect indoor finishes: When working near the air handler, cover flooring or drywall edges.
You’ll also want to know where your filtration starts. A clogged filter often sends extra dirt straight toward the evaporator section, so checking where your air filter is in your house helps you understand why the coil got dirty in the first place.
If you have to force a panel, pry a sealed compartment, or guess around wiring, stop there. Coil cleaning should be careful work, not exploratory surgery.
Choosing the right cleaner
The disparity between cleaning outdoor condenser coils and indoor evaporator coils is a common pitfall for many DIY jobs.
For the condenser, use a non-corrosive foaming product intended for outdoor coil cleaning. For the evaporator, use a no-rinse product labeled for indoor evaporator use. Bleach, acidic cleaners, and random degreasers from the garage are bad choices.
The cleaner matters less than the method. Wrong pressure, wrong direction, or too much moisture can do more damage than the dirt you started with.
Cleaning Your Outdoor Condenser Coils Like a Pro
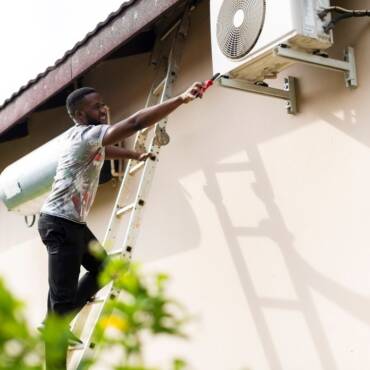
The outdoor unit does the dirty work in Arizona. It sits in direct heat, catches dust every windy day, and gets choked up from the outside in. If you clean one part of the system yourself, this is usually the most accessible place to start.

Start with power and access
Shut the system off at the breaker and the disconnect. Don’t trust just the thermostat. The fan can still start unexpectedly if power is still present.
Then clear debris around the cabinet. Remove leaves, weeds, trash, and anything else crowding the unit. Once that area is clean, remove the access panels so you can reach the coil from the inside.
Dry cleaning before water
Before you bring out the hose, remove as much dry dirt as possible.
- Brush top-down: Use a soft nylon brush and move in the direction of the fins.
- Vacuum loose debris: Keep it gentle so you don’t collapse fin surfaces.
- Check for bent fins: Straighten the worst spots with a fin comb, but don’t obsess over every tiny imperfection.
This step matters more than people think. If you skip straight to water, packed dust often turns into muddy paste and lodges deeper in the coil.
The dirtiest part of a condenser coil is often the back side or the interior face homeowners never see from the yard.
Use the right rinse method
For desert conditions, technique matters as much as cleaner choice. According to this outdoor coil cleaning guide, for Arizona’s dusty climate, always clean condenser coils with low-pressure water (max 40 PSI) from the inside-out to flush debris without re-impaction. The same source advises using a non-corrosive foaming cleaner with a pH of 7-9 for stubborn buildup, and notes that high-pressure washing is a leading cause of fin damage, while using the wrong chemicals can void your warranty.
That inside-out rinse is the trade-off most DIY articles miss. Spraying from the outside is easier, but it can shove dirt deeper into the coil pack. In Mesa, where caliche-like dust already packs tight, that’s a poor shortcut.
If buildup is light, a thorough inside-out rinse may be enough. If it’s stuck on, use the cleaner, let it dwell as directed, then rinse again from the inside out until the water runs clear.
For homeowners comparing products and methods, this guide on condensing coil cleaner is a useful companion.
A field-tested cleaning sequence
This order works well for most residential condensers:
- Kill power completely
- Remove panels for full coil access
- Brush off dry dust
- Vacuum loose debris carefully
- Straighten visibly bent fins
- Rinse from inside out with low-pressure water
- Apply non-corrosive foaming coil cleaner if needed
- Let the cleaner dwell briefly
- Rinse again, inside out
- Reassemble panels and restore power
What not to do outside
A lot of condenser damage comes from trying to make the job “easier.”
- Don’t use a pressure washer: It can flatten fins and restrict airflow.
- Don’t blast from the outside in: That packs debris deeper.
- Don’t soak electrical compartments: Keep water controlled and directed.
- Don’t use harsh chemicals: They can damage coil materials and create warranty problems.
- Don’t skip panel removal if the coil is heavily loaded: Surface rinsing won’t touch the worst buildup.
How to tell when you did it right
You’re not looking for cosmetic perfection. You’re looking for open fin passages, better airflow through the coil, and cleaner runoff during rinsing. If the coil still looks matted with dirt on the inside face, it’s not clean yet.
In Arizona, the outdoor condenser often needs more frequent attention than homeowners expect. If your yard is dusty, the home backs to open land, or the unit sits near blowing dirt, coil inspection should become part of your normal warm-season routine.
Tackling the Indoor Evaporator Coils
Indoor coil cleaning is where DIY confidence needs to slow down. The evaporator coil is more delicate, often harder to access, and much less forgiving if you use too much water or the wrong cleaner.
It also does a huge amount of hidden work. The indoor evaporator coil pulls heat from your indoor air, and when it gets coated in dust and film, cooling drops off even if the blower keeps running.

Access matters more than effort
Turn power off at the breaker before opening the air handler or furnace coil compartment. The evaporator coil is commonly housed in a metal cabinet above or beside the furnace, depending on system layout.
Some panels come off easily. Some do not. If access is straightforward and you can clearly see the coil face, you may be able to clean it safely. If the cabinet is cramped or sealed in a way that limits visibility, don’t start forcing things.
You can learn more about identification and placement from this page on where evaporator coils are located.
Dry debris first, then foam
According to this evaporator coil cleaning reference, the indoor evaporator coil can trap up to 60% of airborne particulates, and a proper cleaning with a no-rinse foaming cleaner can restore airflow by over 90% and cut mold counts significantly, which is especially important for homes with allergy sufferers. The same source warns that you should never use a high-pressure hose indoors, and a spray bottle is the most you should ever use for rinsing if necessary.
That matches real-world practice. Indoor coil cleaning should feel controlled and a little slow.
Use this process:
- Remove loose dirt gently: Use a soft brush and vacuum with a brush attachment.
- Work opposite the airflow direction when practical: That helps lift debris rather than bury it.
- Apply no-rinse foaming evaporator cleaner: Coat the accessible surface evenly.
- Let the foam dwell: Give it time to break down film and stuck-on dust.
- Use a spray bottle only if the product allows light rinsing: Never hose the coil indoors.
A soaked attic platform, wet insulation, or water in the supply plenum is not a sign of a thorough cleaning. It’s a sign the method went wrong.
Don’t ignore the drain side
When the evaporator coil gets cleaned, debris often ends up moving toward the condensate system. That’s why checking the drain pan and drain line matters.
Look for standing water, slime, rust, or a slow drain. If the line is clogged, a wet vac at the exterior drain termination can often help pull it clear. If the pan is badly corroded or the drain arrangement looks questionable, that’s a good point to stop and bring in a technician.
Indoor cleaning mistakes that cause trouble
Indoor coil jobs go bad for a few predictable reasons:
- Too much water: This can damage nearby materials and create moisture issues.
- Wrong cleaner: Harsh products can harm coil surfaces or leave residue.
- Poor access: You clean only the visible edge and leave the main buildup untouched.
- Bent fins: Aggressive brushing can damage the coil face.
- Ignoring the drain: Cleaning the coil without checking drainage can create overflow later.
When a decent DIY is enough
If you can access the coil, remove surface debris, apply the right no-rinse cleaner, and confirm the drain path is open, that can make a noticeable difference. For a lightly to moderately dirty coil, that’s often the right level of homeowner maintenance.
If the coil has thick buildup deep inside the fins, visible corrosion, microbial growth, or blocked access, this stops being a simple spray-and-go project. Indoor coils demand judgment more than force.
Common Mistakes and When to Call Comfort Experts
Most homeowners can handle basic outdoor coil cleaning if they work carefully. Fewer should attempt deep indoor coil cleaning, especially in older Arizona homes with tight closets, attic installations, or sealed coil cabinets.
The biggest mistake is assuming more force means better cleaning. It doesn’t. Pressure washers flatten fins. Strong chemicals can damage the coil. Prying open a hard-to-access evaporator section can create a much bigger problem than dirt ever did.
DIY mistakes that cost people later
Some problems show up immediately. Others show up during the next heat wave.
- Using high pressure: Fins bend, airflow drops, and the coil gets harder to clean next time.
- Choosing the wrong chemical: Corrosion and warranty trouble can follow.
- Cleaning only what you can see: Surface dirt comes off, deeper restriction stays.
- Forcing evaporator access: Panels, insulation, tubing, or fittings can get damaged.
- Skipping shutdown steps: Live equipment is never worth the risk.
The hard truth about older Arizona homes
In many Valley homes, evaporator access is poor from the start. Some systems were installed in ways that make full cleaning difficult without specialized tools. According to this Arizona coil access reference, in many Arizona homes, especially older ones, indoor evaporator coils are not easily accessible. The same source notes that attempting to force access can lead to refrigerant leaks, and that technicians sometimes must pump down the system and unsolder the coil for proper cleaning, which is unsafe and illegal for DIYers. It also states that neglect contributes to 20-30% of system failures in these situations.
That’s the line homeowners need to respect. If a proper cleaning requires refrigerant handling, brazing, coil removal, or opening a sealed system, that is no longer a DIY maintenance task.
If your unit already has weak cooling, icing, unusual noise, or signs of a bigger performance issue, it also makes sense to read about AC repair service near me so you know what symptoms point beyond cleaning alone.
If you can’t reach the coil safely, can’t clean it without forcing access, or can’t tell whether dirt is the real issue, stop before you create an expensive repair.
A good rule is simple. Clean what’s accessible, use the correct products, and stay gentle. Call a pro when access is limited, the coil is heavily impacted, or refrigerant-side work is involved.
If your AC still isn’t cooling the way it should, or the coil setup in your home looks too cramped to clean safely, Comfort Experts can help. Call 480-207-1239 or schedule service to have the job handled the right way before the next Mesa heat surge hits.
Whether you require installation, repair, or maintenance, our technicians will assist you with top-quality service at any time of the day or night. Take comfort in knowing your indoor air quality is the best it can be with MOE heating & cooling services Ontario's solution for heating, air conditioning, and ventilation that’s cooler than the rest.
Contact us to schedule a visit. Our qualified team of technicians, are always ready to help you and guide you for heating and cooling issues. Weather you want to replace an old furnace or install a brand new air conditioner, we are here to help you. Our main office is at Kitchener but we can service most of Ontario's cities
Source link