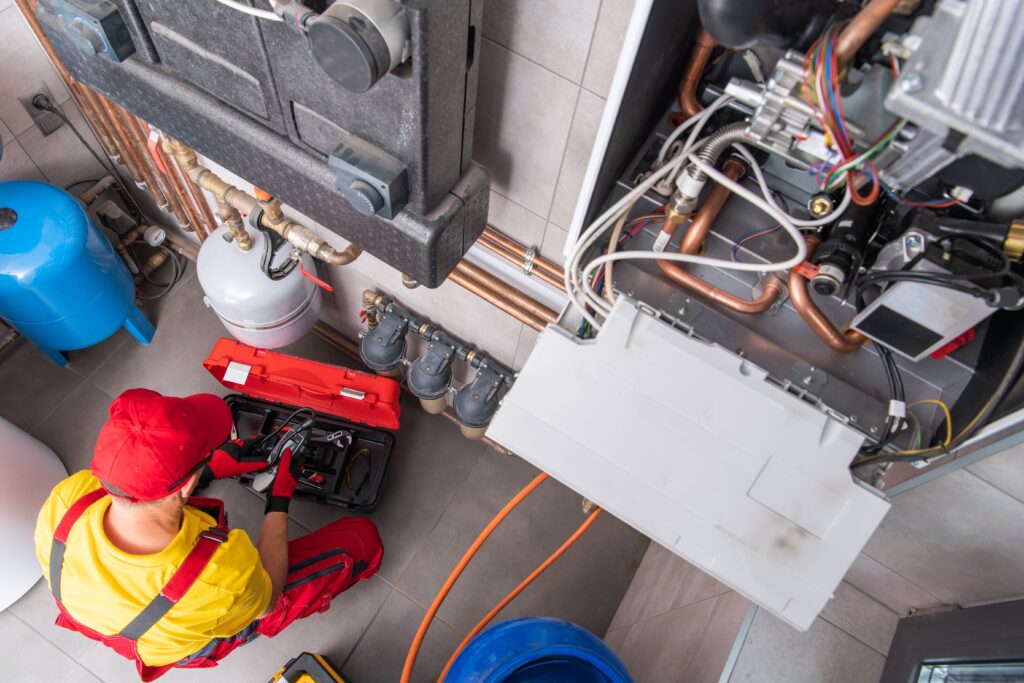
When your house feels warm but the thermostat insists everything’s fine, frustration shows up fast. **Thermostat calibration** sounds like the obvious fix, but in Phoenix-area homes, the thermostat isn’t always the underlying problem.
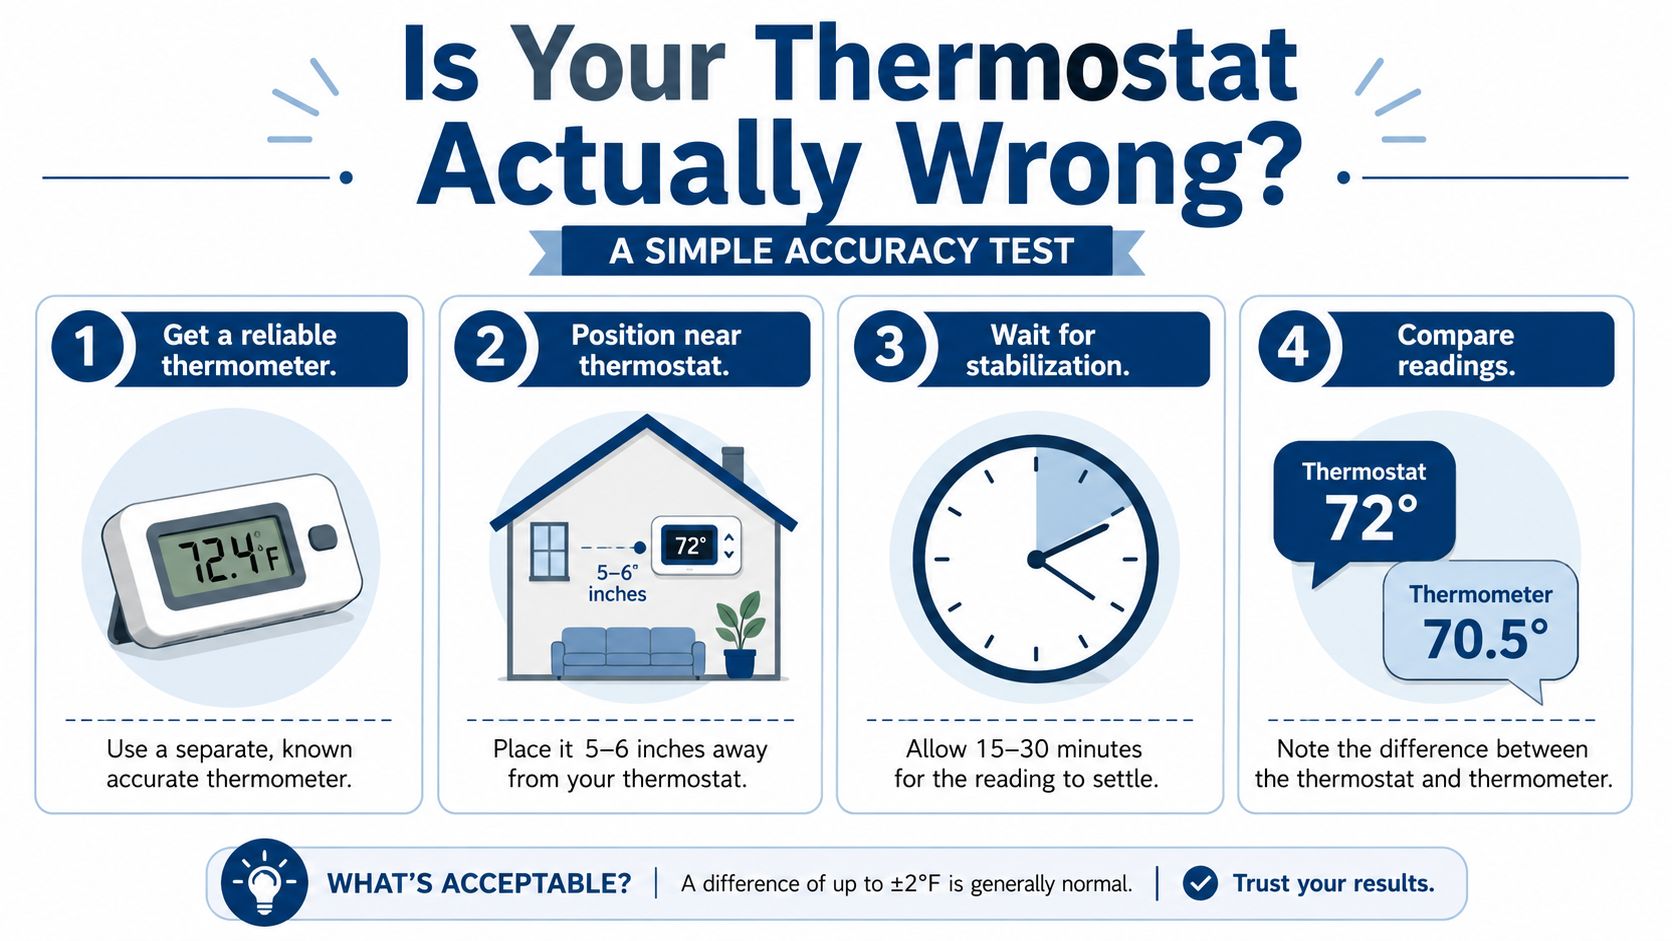
Is Your Thermostat Actually Wrong A Simple Accuracy Test
It is 6 p.m. in Phoenix, the house feels sticky, and the thermostat says 74. Before you start changing settings, check whether the thermostat is reading the room correctly. That quick test can save you from chasing the wrong fix.
At Comfort Experts, we use this as a first check for a reason. If the reading is close, the problem is often the room itself. Sun on the wall, a supply vent blowing nearby, a draft from a gap at the door, or weak airflow through the house can all make comfort feel off even when the thermostat is doing its job.
What you need
Keep it simple:
- A dependable thermometer. A basic digital room thermometer is fine if you know it reads consistently.
- Tape or removable adhesive. Mount it close to the thermostat without covering any vents or openings on either device.
Put the thermometer near the thermostat, in the same room and about the same height from the floor. Close matters here. Across-the-room comparisons can mislead you.
How to run the test correctly
Bad testing causes a lot of false alarms. If you check too fast, you are catching the room while it is still drifting.
Use this process:
- Place the thermometer nearby. Keep it close to the thermostat, not on an opposite wall.
- Leave doors and windows closed so the room has a chance to settle.
- Wait at least 15 to 20 minutes before comparing readings, which is a standard recommendation in a nearby-reference check process (Dynamic Heat and Cool thermostat calibration guide).
- Compare the two readings once the space has stabilized.
- Repeat the check later in the day if you want a cleaner answer, especially in rooms that get strong afternoon sun.
A small difference does not always mean anything is broken. Many thermostats and room thermometers will be a little apart in normal conditions. Once the gap gets beyond a few degrees, it is worth looking closer at calibration, placement, or a hardware problem.
How to read the result
Use the result as a clue, not a verdict.
| Thermostat reading vs. reference | What it usually means | What to do next |
|---|---|---|
| Very close match | The thermostat is probably reading normally | Check airflow, hot spots, drafts, and sun exposure |
| Small difference | Often still within normal operation | Retest before changing any settings |
| Difference above a few degrees | Calibration, placement, or sensor issues are more likely | Diagnose the cause before applying an offset |
That last part matters. A manual offset can hide the underlying issue if the thermostat sits in a bad location. I have seen homeowners “fix” a thermostat that was really just being cooked by west-facing sun every afternoon.
If your thermostat also acts strangely in other ways, this Bear Valley Plumbing & Heating thermostat advice is a useful extra read because it looks at why a thermostat may not reach the set temperature, not just whether the screen is accurate.
If the display is frozen, the schedule is acting erratic, or the problem started after a power blink, check this guide on how to reset an AC thermostat before you assume calibration is the answer.
Why Your Thermostat Might Be Inaccurate And It Is Not Always the Sensor
A thermostat can read the wrong temperature without being defective. That surprises a lot of homeowners.
In the Valley, I see this all the time. The thermostat is mounted in a bad spot, gets hit with a draft, or sits where afternoon sun warms the wall. The sensor reports what it feels right there, not what the rest of the house feels like.

Calibration is often a symptom-level fix. The root cause can be drafts, direct sun, nearby vents, weak airflow, wiring issues, or thermostat placement.
That’s consistent with independent HVAC guidance on inaccurate thermostat readings, which notes that dust, aging, weak batteries, bad wiring, drafts, direct sun, and nearby vents can all throw readings off. That same guidance also notes that when the difference stays in the 1–3°F range or worse, the better fix may be cleaning, relocation, or duct sealing rather than calibration alone.
Common causes that fool a thermostat
Some problems are obvious once you know what to look for. Others are sneaky.
- Direct sunlight. In a Phoenix home, sun on the wall can warm the thermostat housing and create a false high reading.
- Supply vents nearby. If conditioned air blows right on the thermostat, the system may shut off before the rest of the home is comfortable.
- Drafty windows or doors. Moving air near the wall can make the thermostat think the home is cooler or warmer than it is.
- Heat from electronics or lamps. A TV, floor lamp, or other appliance nearby can influence the local reading.
- Dust buildup. Dust around older thermostats can affect sensing.
- Weak batteries or wiring problems. Digital models can act erratically when power is unstable.
- Poor airflow in the house. One hallway might stay cooler while bedrooms or open living spaces lag behind.
A quick root-cause check
Before adjusting offsets, ask yourself:
- Does the problem show up at the same time every day? Afternoon-only discomfort often points to sun load or room exposure.
- Is one area always worse than another? That leans toward airflow or duct balance.
- Did the issue start after furniture, décor, or electronics changed? Something near the thermostat may be affecting it.
- Is the thermostat on an exterior wall? Wall temperature can influence readings.
If you’re installing or replacing a connected control and want to understand setup basics before blaming calibration, this DIY smart thermostat setup gives a decent overview of the installation side.
And if certain rooms seem dusty, stuffy, or uneven, don’t ignore the airflow side. A clogged filter can make a thermostat issue look worse than it is, so it’s worth checking where your air filter is in the house.
Step-by-Step Thermostat Calibration for Every Type
Once the thermostat passes the basic accuracy check and the room around it is not skewing the reading, calibration becomes a simple adjustment job. The catch is that the right fix depends on the thermostat type, and calibration only helps if the thermostat itself is the part that’s off.
Mechanical models are adjusted by hand. Digital and smart models usually use a menu setting for temperature offset or room temperature correction. On some smart thermostats, nothing inside the unit is physically recalibrated. The thermostat just adds or subtracts a value from what the sensor sees.

Thermostat Calibration Methods at a Glance
| Thermostat Type | Calibration Method | Key Tip |
|---|---|---|
| Mechanical | Adjust the calibration screw or stem with a small screwdriver | Make tiny moves only |
| Digital | Enter the installer or settings menu and apply a temperature offset | Confirm the change with a reference thermometer |
| Smart | Use the app or device menu for temperature correction if available | Watch comfort and cycling over time |
Mechanical thermostats
Older mechanical thermostats need patience. If you have a dial thermostat or an older rectangular wall control, there is usually a small calibration screw or stem behind the cover.
As noted earlier in the Cash Parts guide, mechanical models are adjusted in very small increments, and smart models use an offset setting in the menu or app. That small-step approach matters. Turn too far, and you can spend the next hour chasing the setting back and forth.
Use this process:
- Turn the system off at the thermostat.
- Remove the cover carefully and find the calibration screw or stem.
- Make a very small adjustment with a screwdriver.
- Reinstall the cover and let the thermostat run normally.
- Wait for the room to settle, then compare the thermostat to your reference thermometer again.
- Repeat only if the reading is still consistently off.
A lot of older thermostats in Phoenix homes are worn out. If the anticipator looks damaged, the switch contacts are dirty, or the reading drifts all over the place, replacement usually makes more sense than repeated tweaking.
Digital thermostats
Digital thermostats are usually easier to correct because you are changing a setting instead of a mechanical part. Look in the menu for one of these labels:
- Temperature offset
- Room temperature correction
- Calibration
- Sensor adjustment
Set the correction based on your verified thermometer, then stop and live with it for a bit. A small offset is usually enough. If a digital thermostat needs a big correction to feel right, that points back to placement, airflow, or a failing thermostat.
A few habits help avoid bad adjustments:
- Use repeated readings, not one snapshot
- Record the original setting before you change it
- Retest after battery changes or a reset
- Do not keep stacking corrections on top of guesses
If you are dealing with a newer connected control, this smart thermostat installation guide covers setup details that often get mistaken for calibration problems.
Smart thermostats
Smart thermostats add another layer because comfort problems are not always sensor problems. Scheduling, occupancy features, remote sensors, geofencing, and eco modes can all change what the system does. I see this a lot. A homeowner thinks the thermostat reads wrong, but the issue is a schedule holding the house warmer in the afternoon or a sensor in a better-conditioned room calling the shots.
Start in the app or device menu and find the temperature correction setting, if the model offers one. Then make a small adjustment and watch how the house feels over the next day or two.
Use this checklist while testing:
- Pause schedule changes if possible
- Turn off special modes during the test
- Apply only a small correction
- Watch run times, room comfort, and temperature consistency
For some homes in Mesa and across the Phoenix area, a newer thermostat solves more than calibration ever will because the old control is limited, erratic, or not matched well to the equipment. Comfort Experts handles thermostat installation for homeowners who would rather skip the wiring, app setup, and installer menus.
What to Do After Calibration for Perfect Comfort
You calibrate the thermostat on a mild evening, the number looks right, and by the next afternoon the hallway still feels fine while the back bedrooms are warm. That usually means the thermostat was only part of the story.
After any calibration, give the house a fair test under normal conditions. Use a good reference thermometer in the same room, let conditions settle, then check again more than once instead of trusting a single snapshot. As noted earlier from Daikin Quebec’s guidance, it also helps to confirm performance in both heating and cooling if your system uses both modes.
Watch comfort patterns for a few days
The display matters less than what the house is doing.
Pay attention to these signs:
- Short cycling or frequent starts can mean the correction was set too far, or the system has an airflow or equipment issue.
- One part of the house staying uncomfortable usually points to duct balance, insulation differences, or poor air movement, not a bad thermostat number.
- Problems that show up at the same time every day often track back to west-facing sun, hot attic conditions, or a room that gets poor return airflow.
- A thermostat that seems right at night but off in the afternoon may be reacting to sunlight on the wall, a nearby supply register, or a draft around the device.
This is the part many guides skip. Calibration can clean up a small reading error, but it cannot fix a thermostat that sits in a bad location or a house that is feeding it bad information.
Check the system around the thermostat
If comfort still feels off, look at the simple stuff first. A dirty filter, weak airflow, closed vents, or a return blocked by furniture can make a properly calibrated thermostat look guilty when the problem is the system struggling to move air.
Good upkeep makes the calibration mean something. This HVAC preventive maintenance checklist is a solid place to review the basics that affect temperature consistency throughout the house.
In Phoenix-area homes, I also tell homeowners to notice where the thermostat lives during the hottest part of the day. If that wall gets sun, if the ceiling above it is hot, or if the hallway never reflects the toughest room in the house, perfect calibration still will not deliver perfect comfort.
When Calibration Is Not Enough Your Next Steps
Sometimes thermostat calibration works nicely. Sometimes it doesn’t change much at all.
If you checked the reading, ruled out obvious placement problems, made a careful adjustment, and still have hot and cold spots, the issue usually goes deeper than the thermostat. In real homes, that often means airflow imbalance, duct leakage, equipment performance issues, or sensor location problems that need proper diagnosis.

A simple decision path
Use this line of thinking:
- If the thermostat tested accurate from the start, stop focusing on calibration and inspect airflow, filters, vents, and room conditions.
- If the thermostat was off and calibration fixed the mismatch, monitor comfort and system cycling for a while.
- If calibration helped the number but not the comfort, suspect duct balance, insulation differences, or equipment issues.
- If the reading keeps drifting back, the thermostat may be aging, poorly located, or failing electrically.
- If one room is always uncomfortable while the thermostat hallway feels fine, the thermostat may be telling the truth for that hallway only.
Why this matters beyond comfort
This isn’t just about whether the living room feels pleasant. According to TEK’s explanation of why temperature calibration matters, proper calibration supports comfort, energy efficiency, and safety, and in HVAC, inaccurate temperature sensing can make systems work harder than needed. In industrial settings, documented calibration is even a core requirement under standards such as ISO 9001.
That same principle applies at home in a practical way. When the control signal is wrong, the system can run at the wrong time, shut off too early, or keep chasing a temperature the house never evenly reaches.
If you keep changing thermostat settings but the house never feels right, stop treating the thermostat like the only suspect.
For homeowners who reach that point, a professional diagnostic visit is usually faster and cheaper than swapping parts blindly. If you’re seeing persistent comfort issues after your DIY checks, this local page on AC repair service near me is a useful next step.
If you want an honest diagnosis instead of more guessing, reach out to Comfort Experts. You can call 480-207-1239 or schedule service online for a technician to check the thermostat, airflow, and the rest of the system as a whole.
Whether you require installation, repair, or maintenance, our technicians will assist you with top-quality service at any time of the day or night. Take comfort in knowing your indoor air quality is the best it can be with MOE heating & cooling services Ontario's solution for heating, air conditioning, and ventilation that’s cooler than the rest.
Contact us to schedule a visit. Our qualified team of technicians, are always ready to help you and guide you for heating and cooling issues. Weather you want to replace an old furnace or install a brand new air conditioner, we are here to help you. Our main office is at Kitchener but we can service most of Ontario's cities
Source link